GitLab Integration - Complete Setup Guide
Localit.io provides powerful GitLab integration, allowing you to automate localization workflow and synchronize translations directly with your repository. Both GitLab.com and self-hosted GitLab installations are supported.
Supported GitLab versions
GitLab.com (Cloud)
-
Standard integration with public and private repositories
-
Full feature support
-
Automatic webhooks
GitLab Self-Hosted
-
GitLab Community Edition (CE) support
-
GitLab Enterprise Edition (EE) support
-
Integration with corporate installations
-
Configuration through custom domains
-
Compatibility with corporate security policies
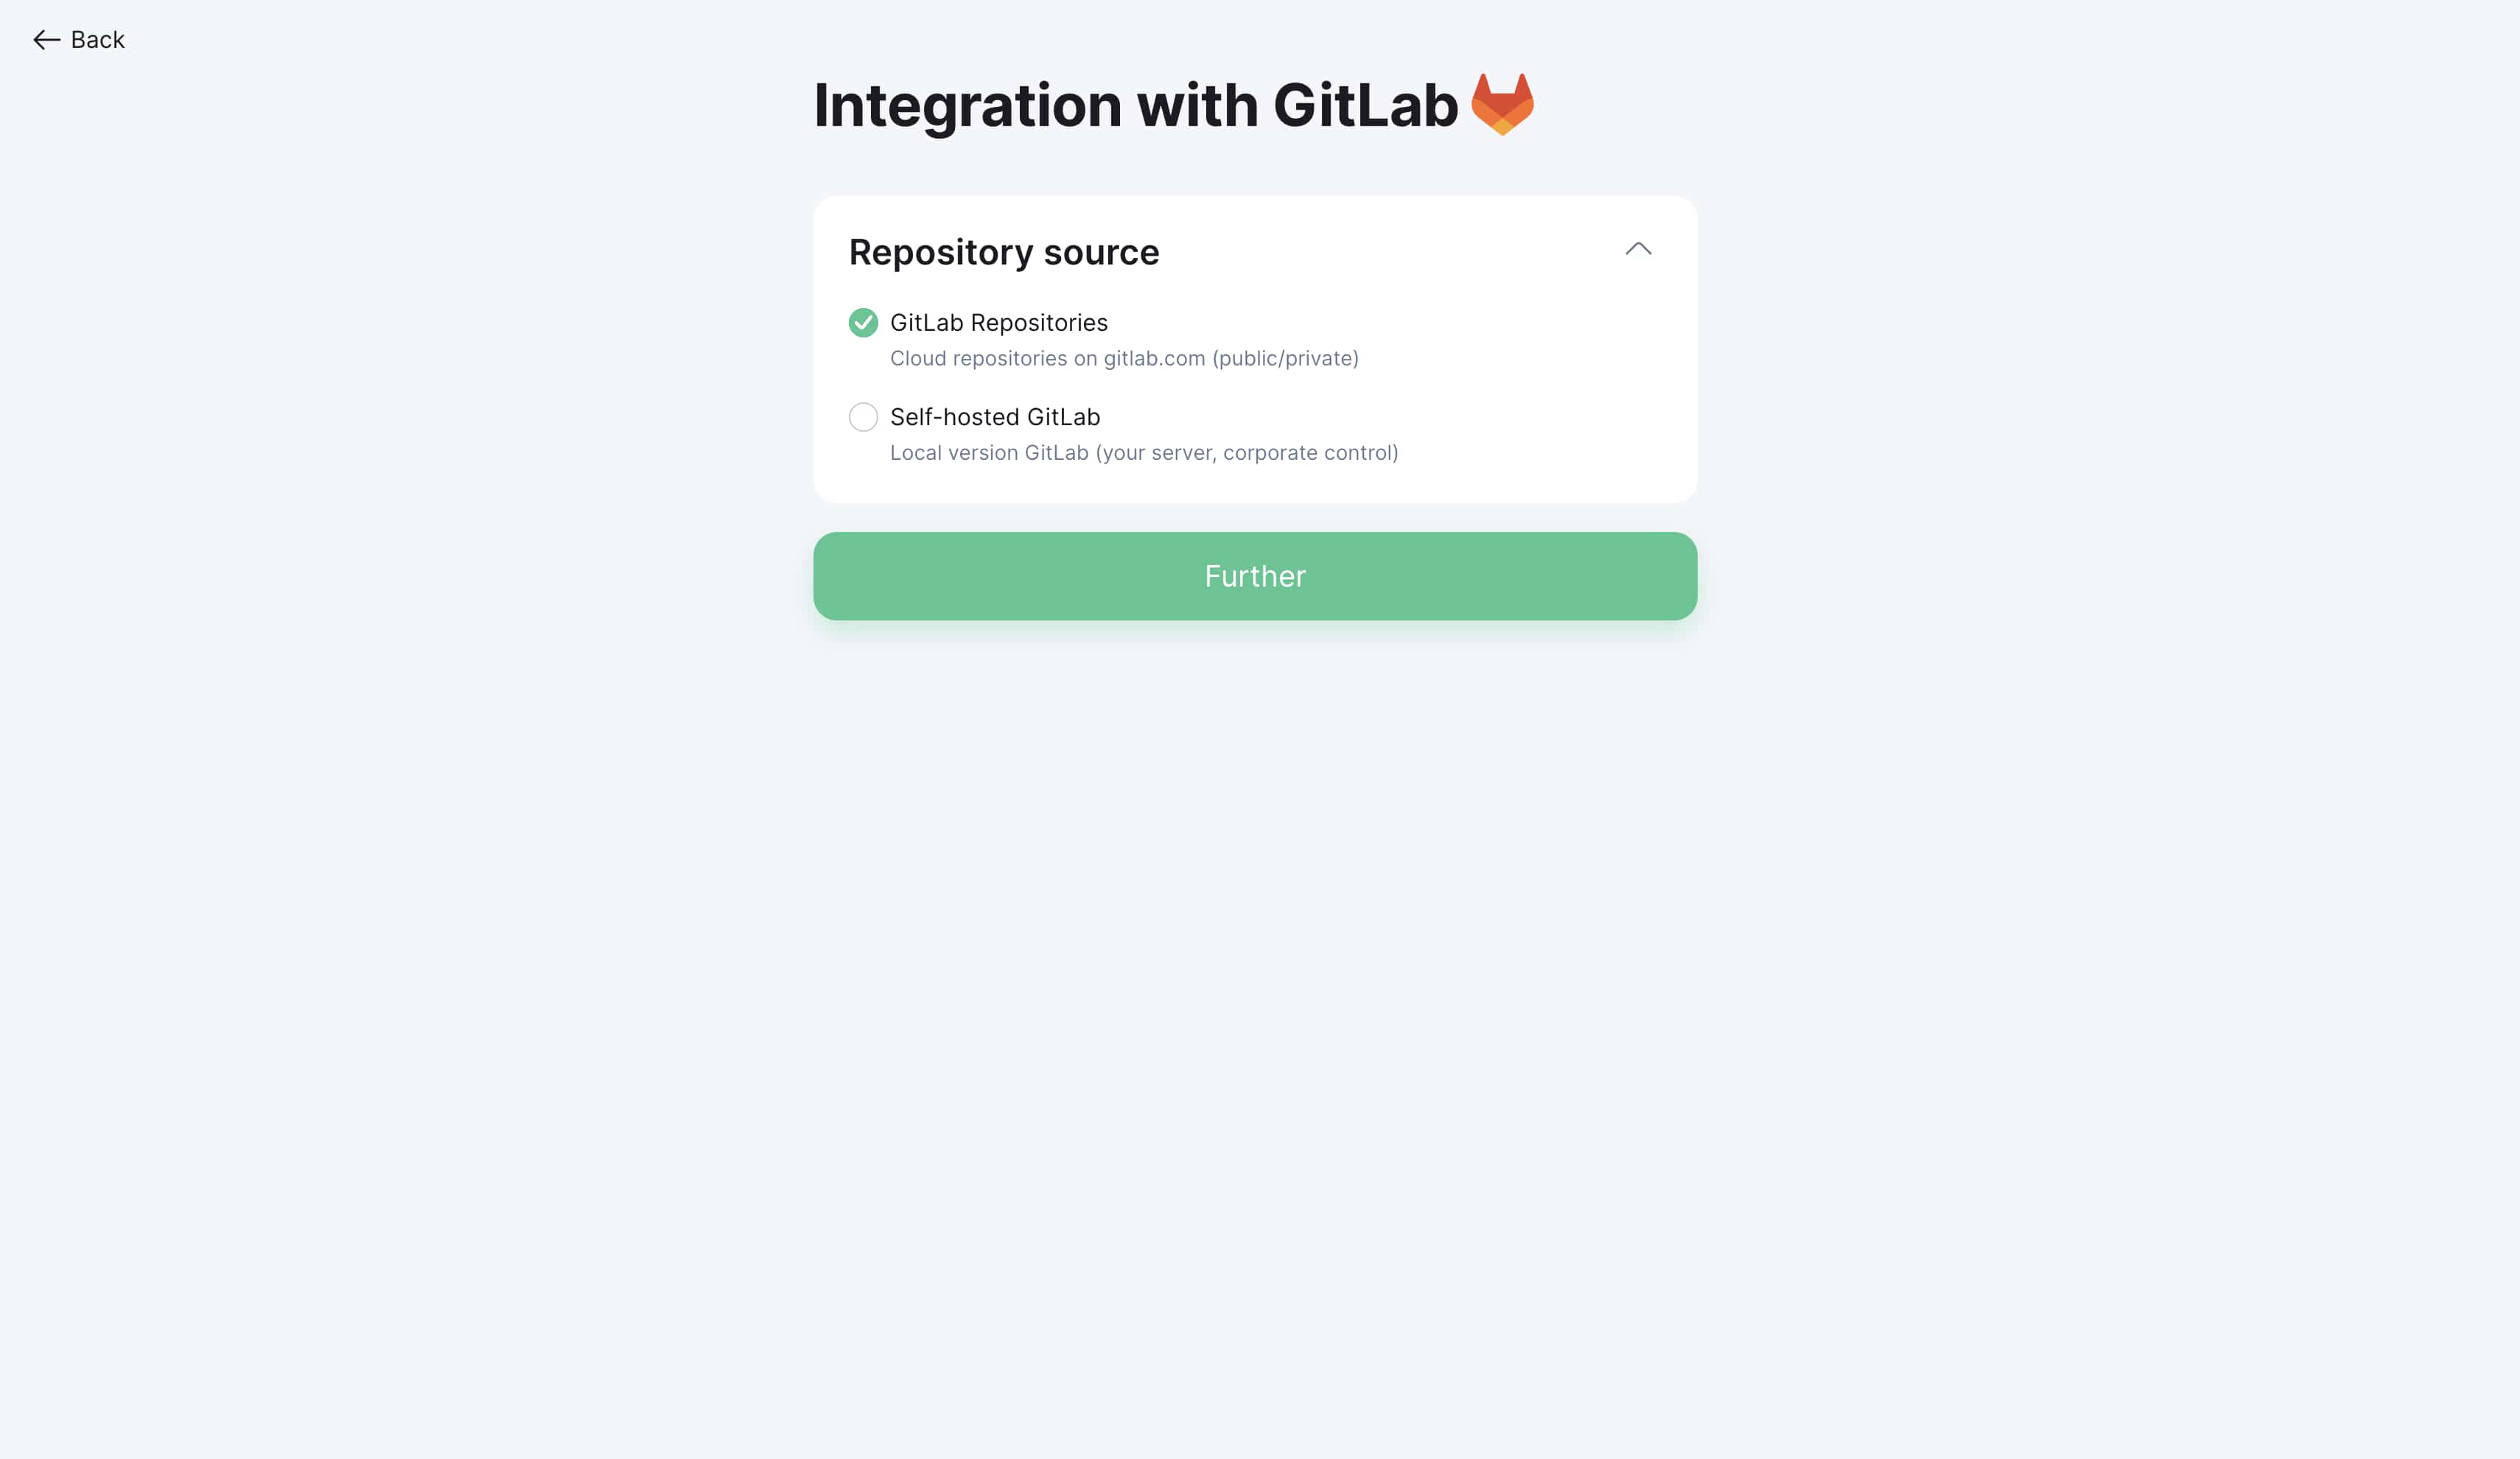
Initial integration setup
Step 1: Access settings
-
Open your project in Localit.io
-
Go to the "Integrations" section
-
Select GitLab from the list of available services
Step 2: Choose token type
GitLab offers two types of access tokens:
-
Personal Access Token — user token with access to all their projects
-
Project Access Token — token for specific project (recommended)
Creating Personal Access Token
Step 1: Navigate to GitLab settings
-
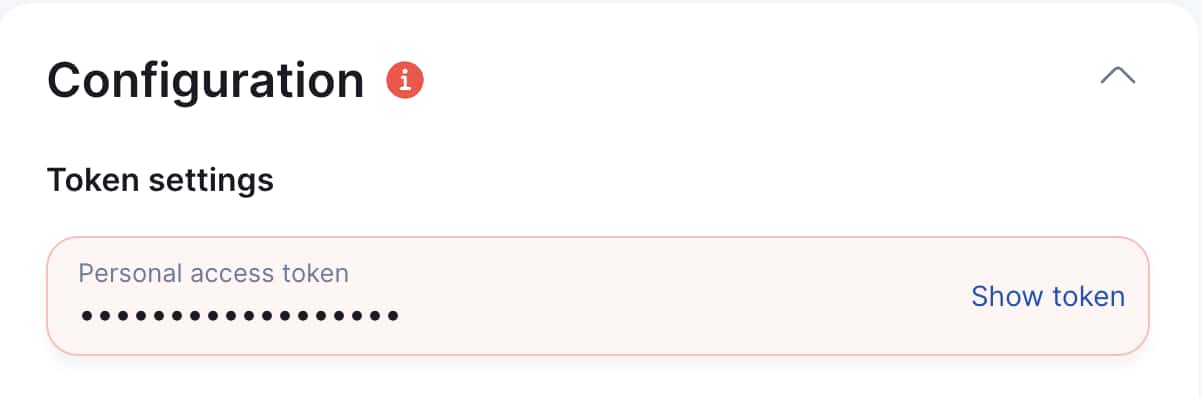
Click "Show token" in the Localit.io interface
-
GitLab User Settings page will open
-
Go to "Personal access tokens" section
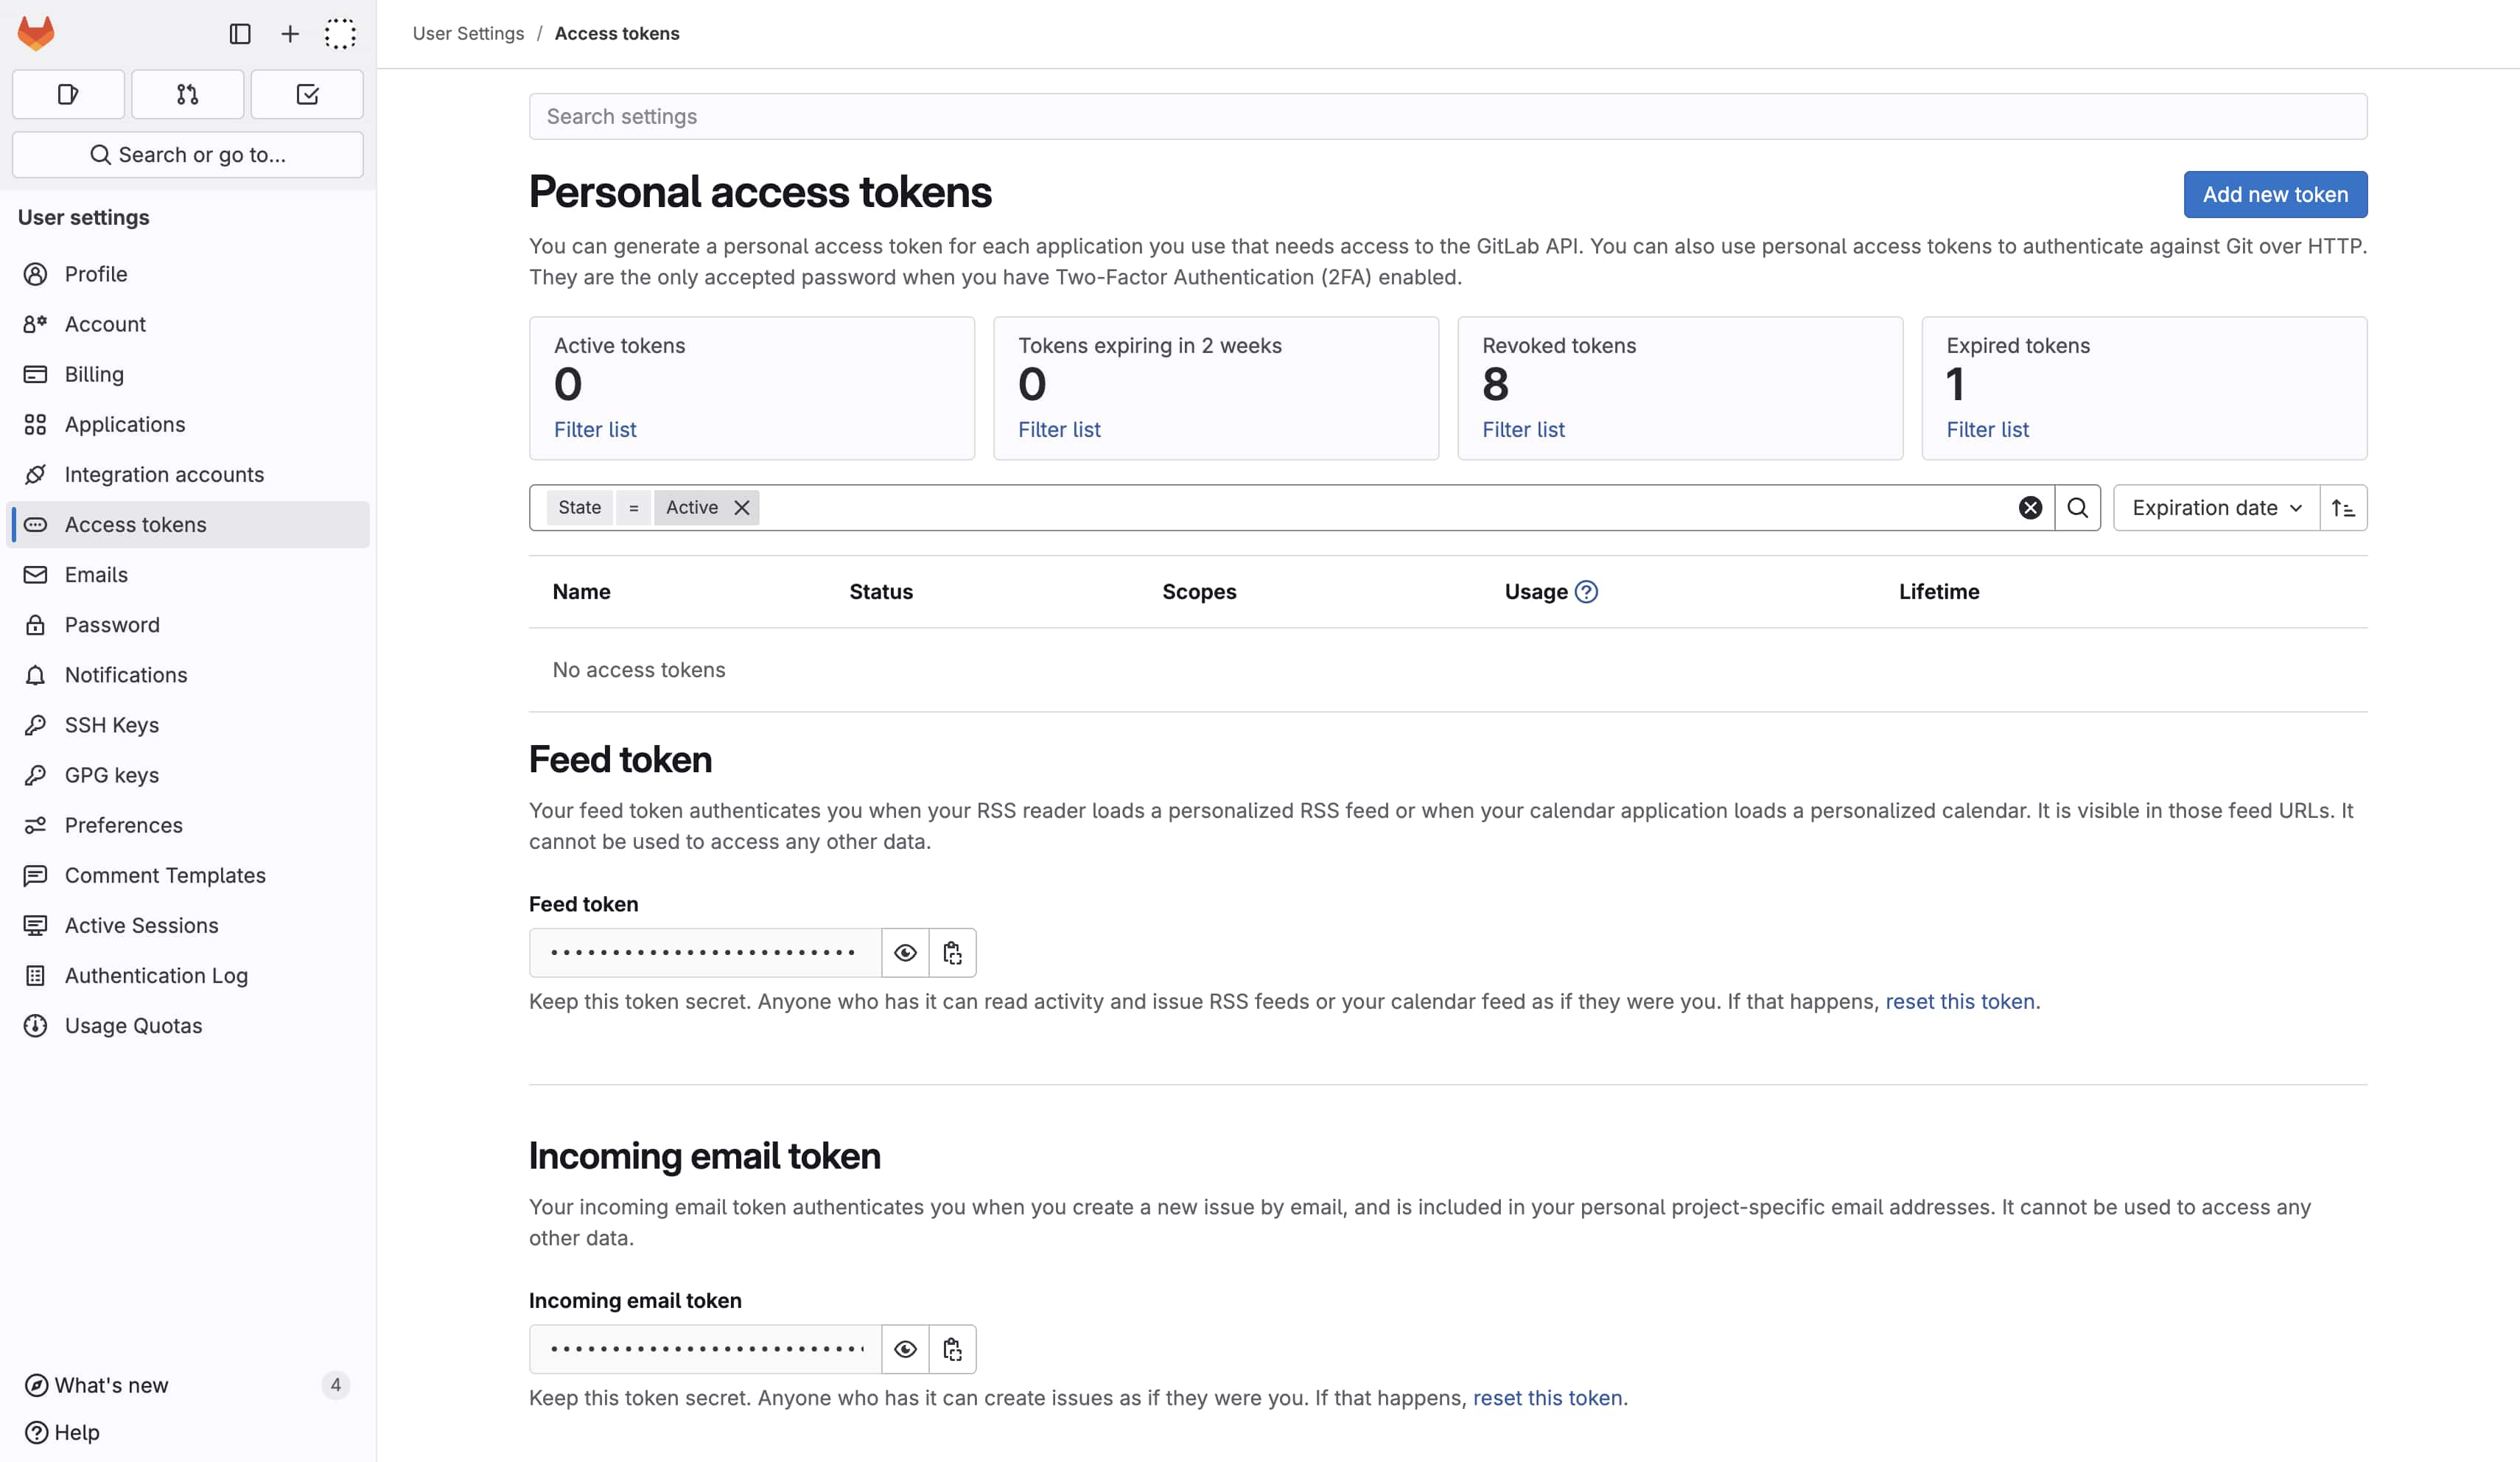
Step 2: Create new token
-
Click "Add new token"
-
Fill in basic token information
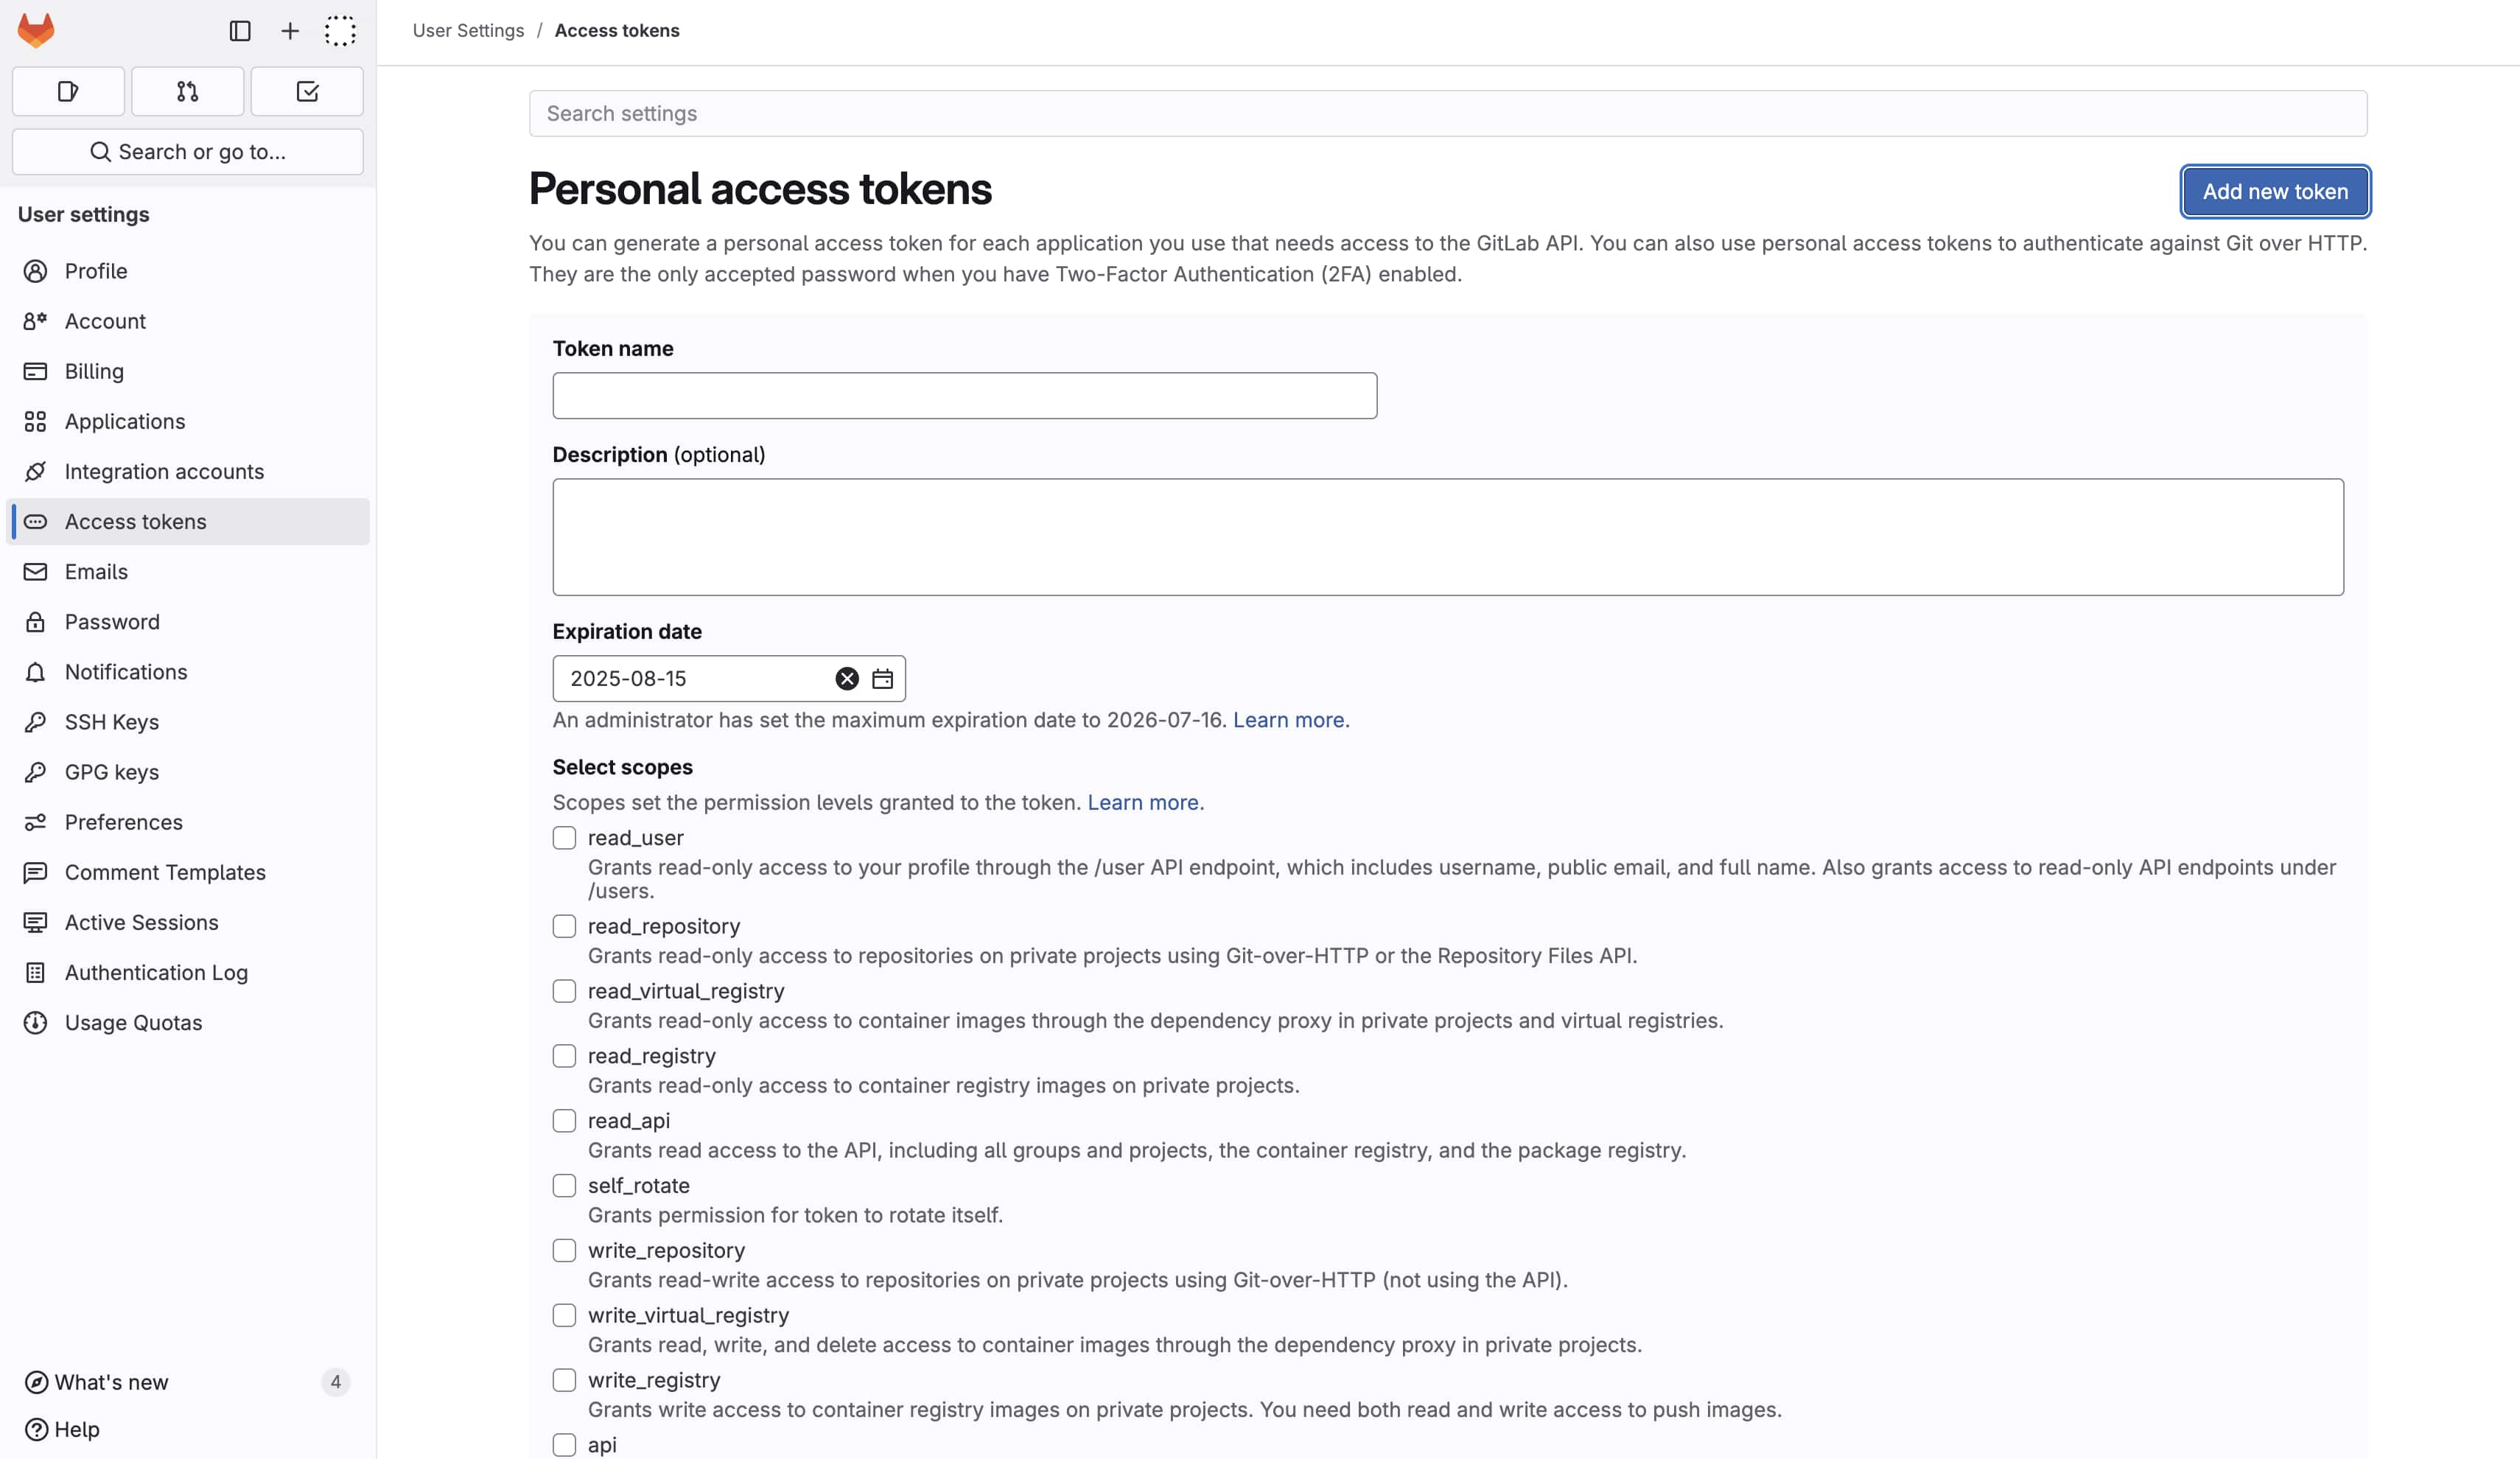
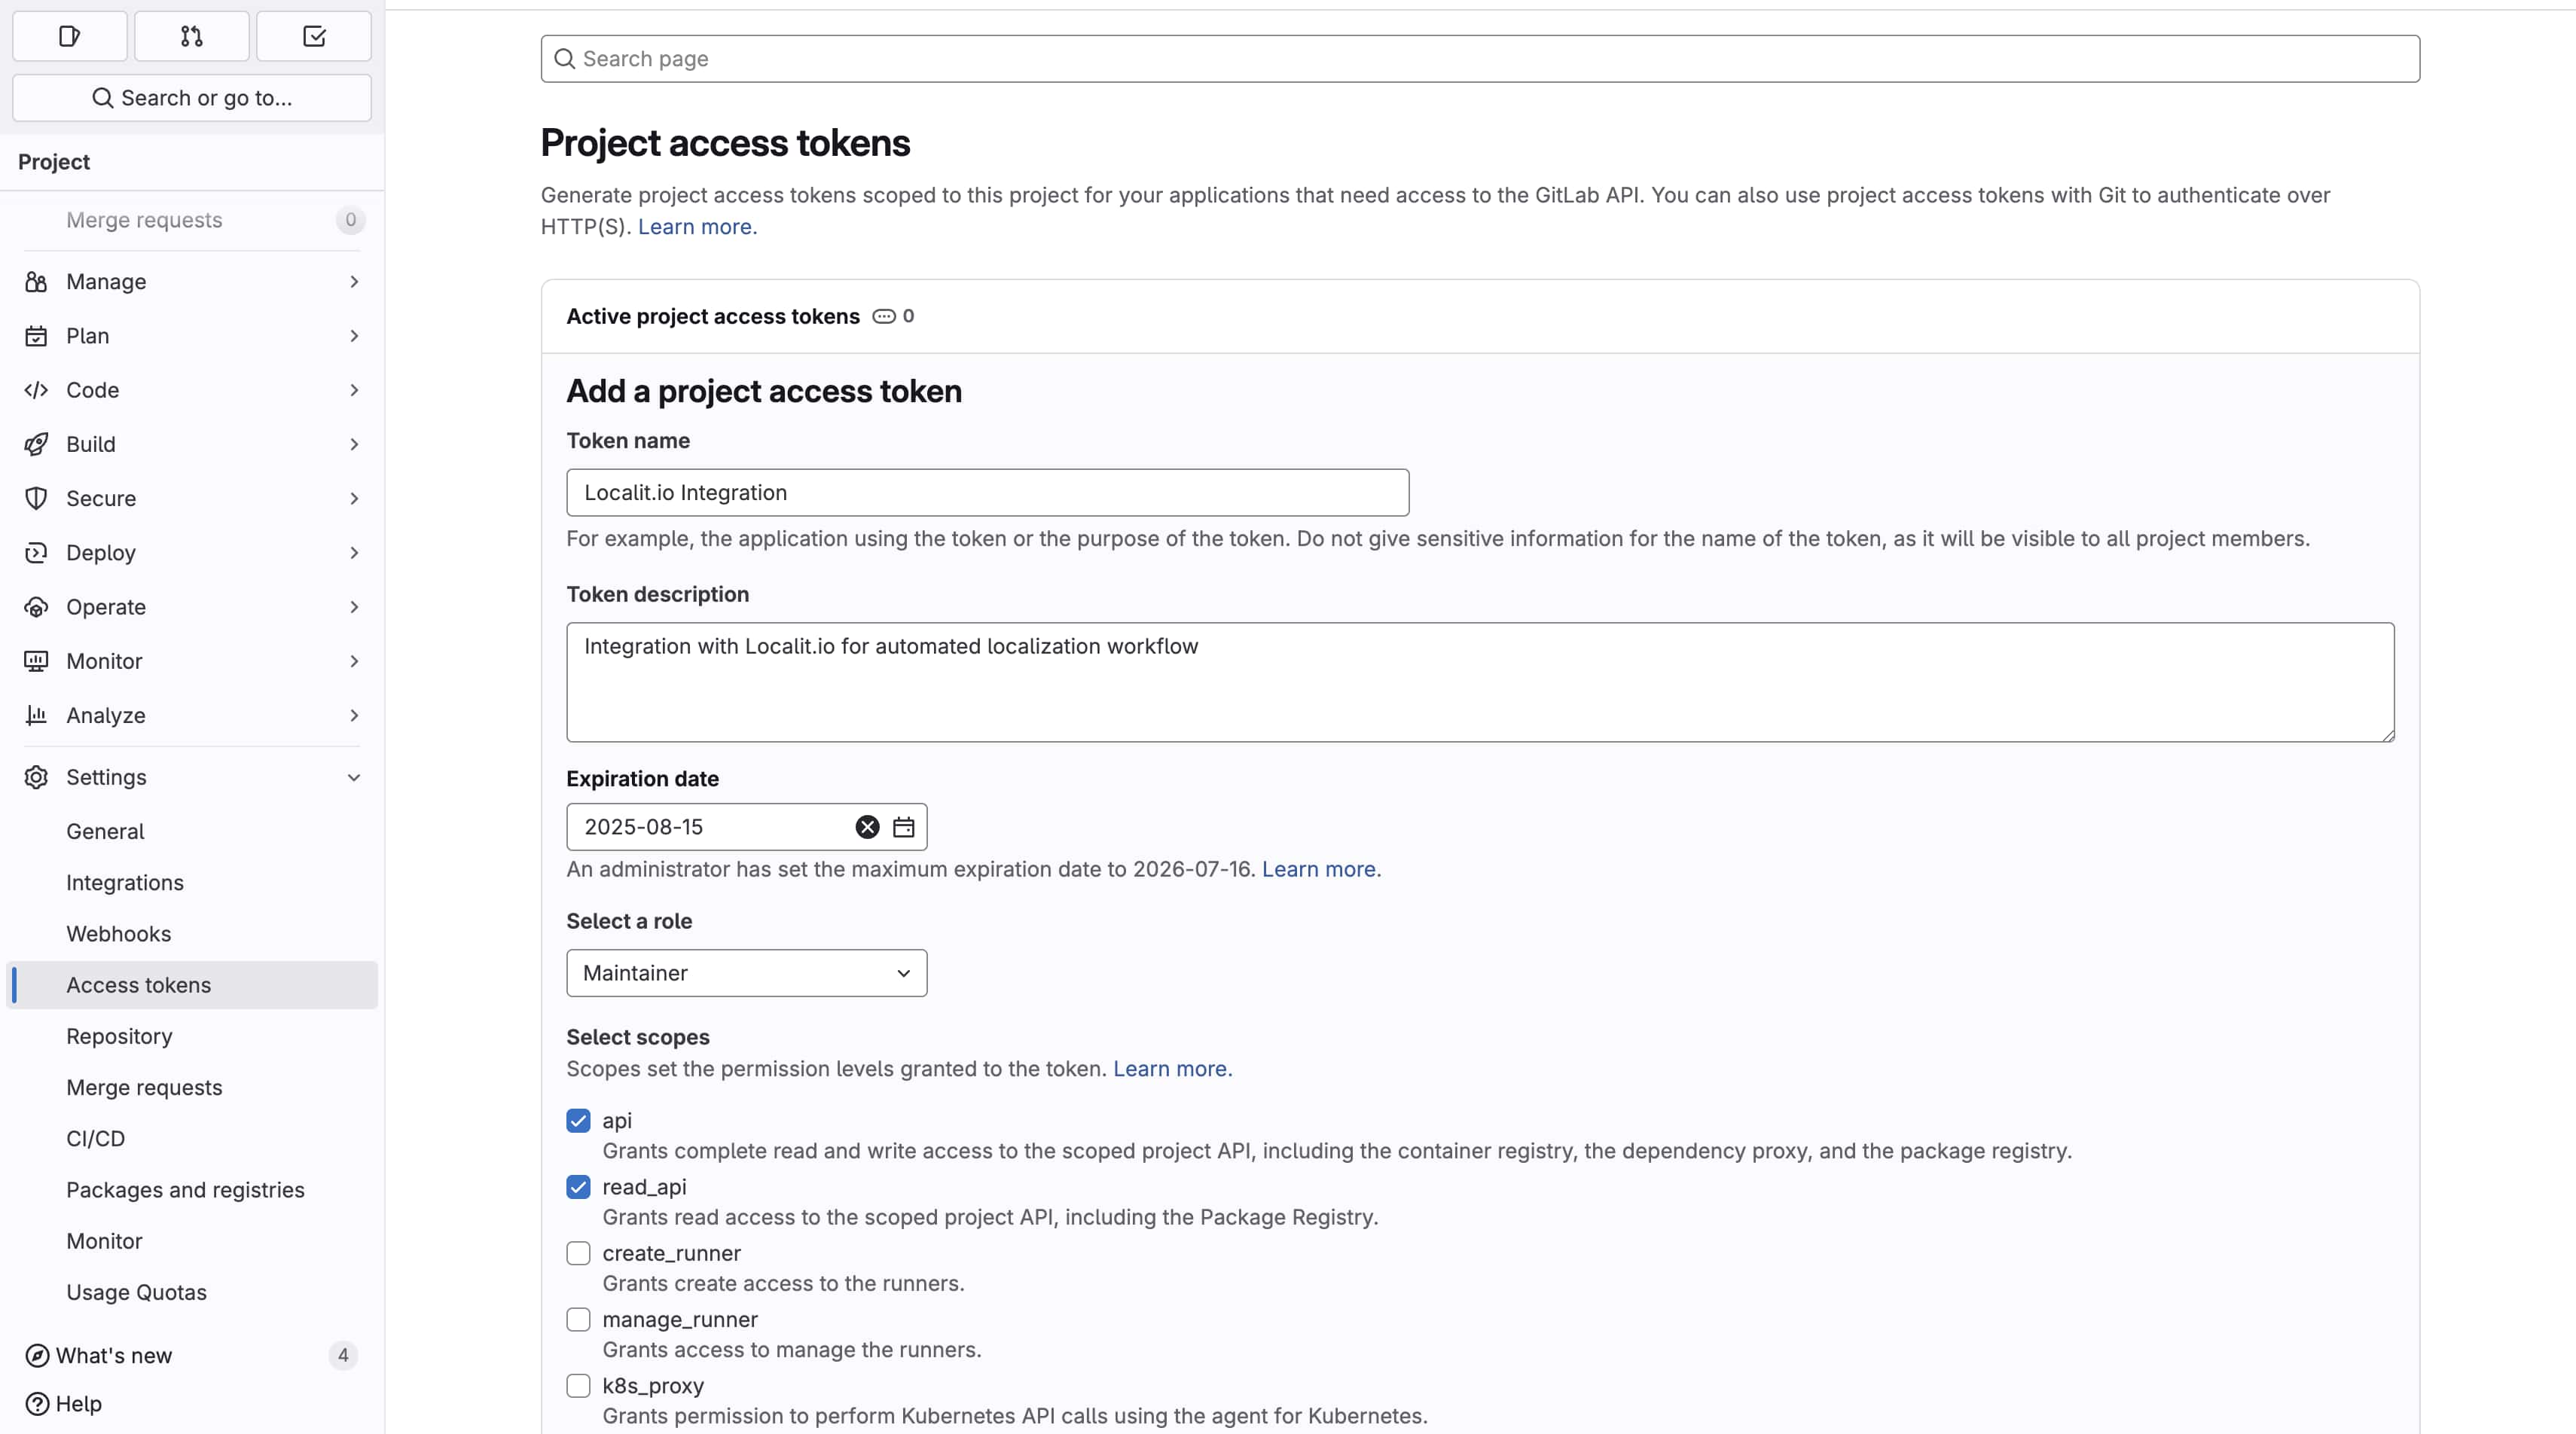
Step 3: Configure basic parameters
Token name: Localit.io Integration
Expiration date: Pick the latest possible date
Description: Integration with Localit.io for automated localization workflow
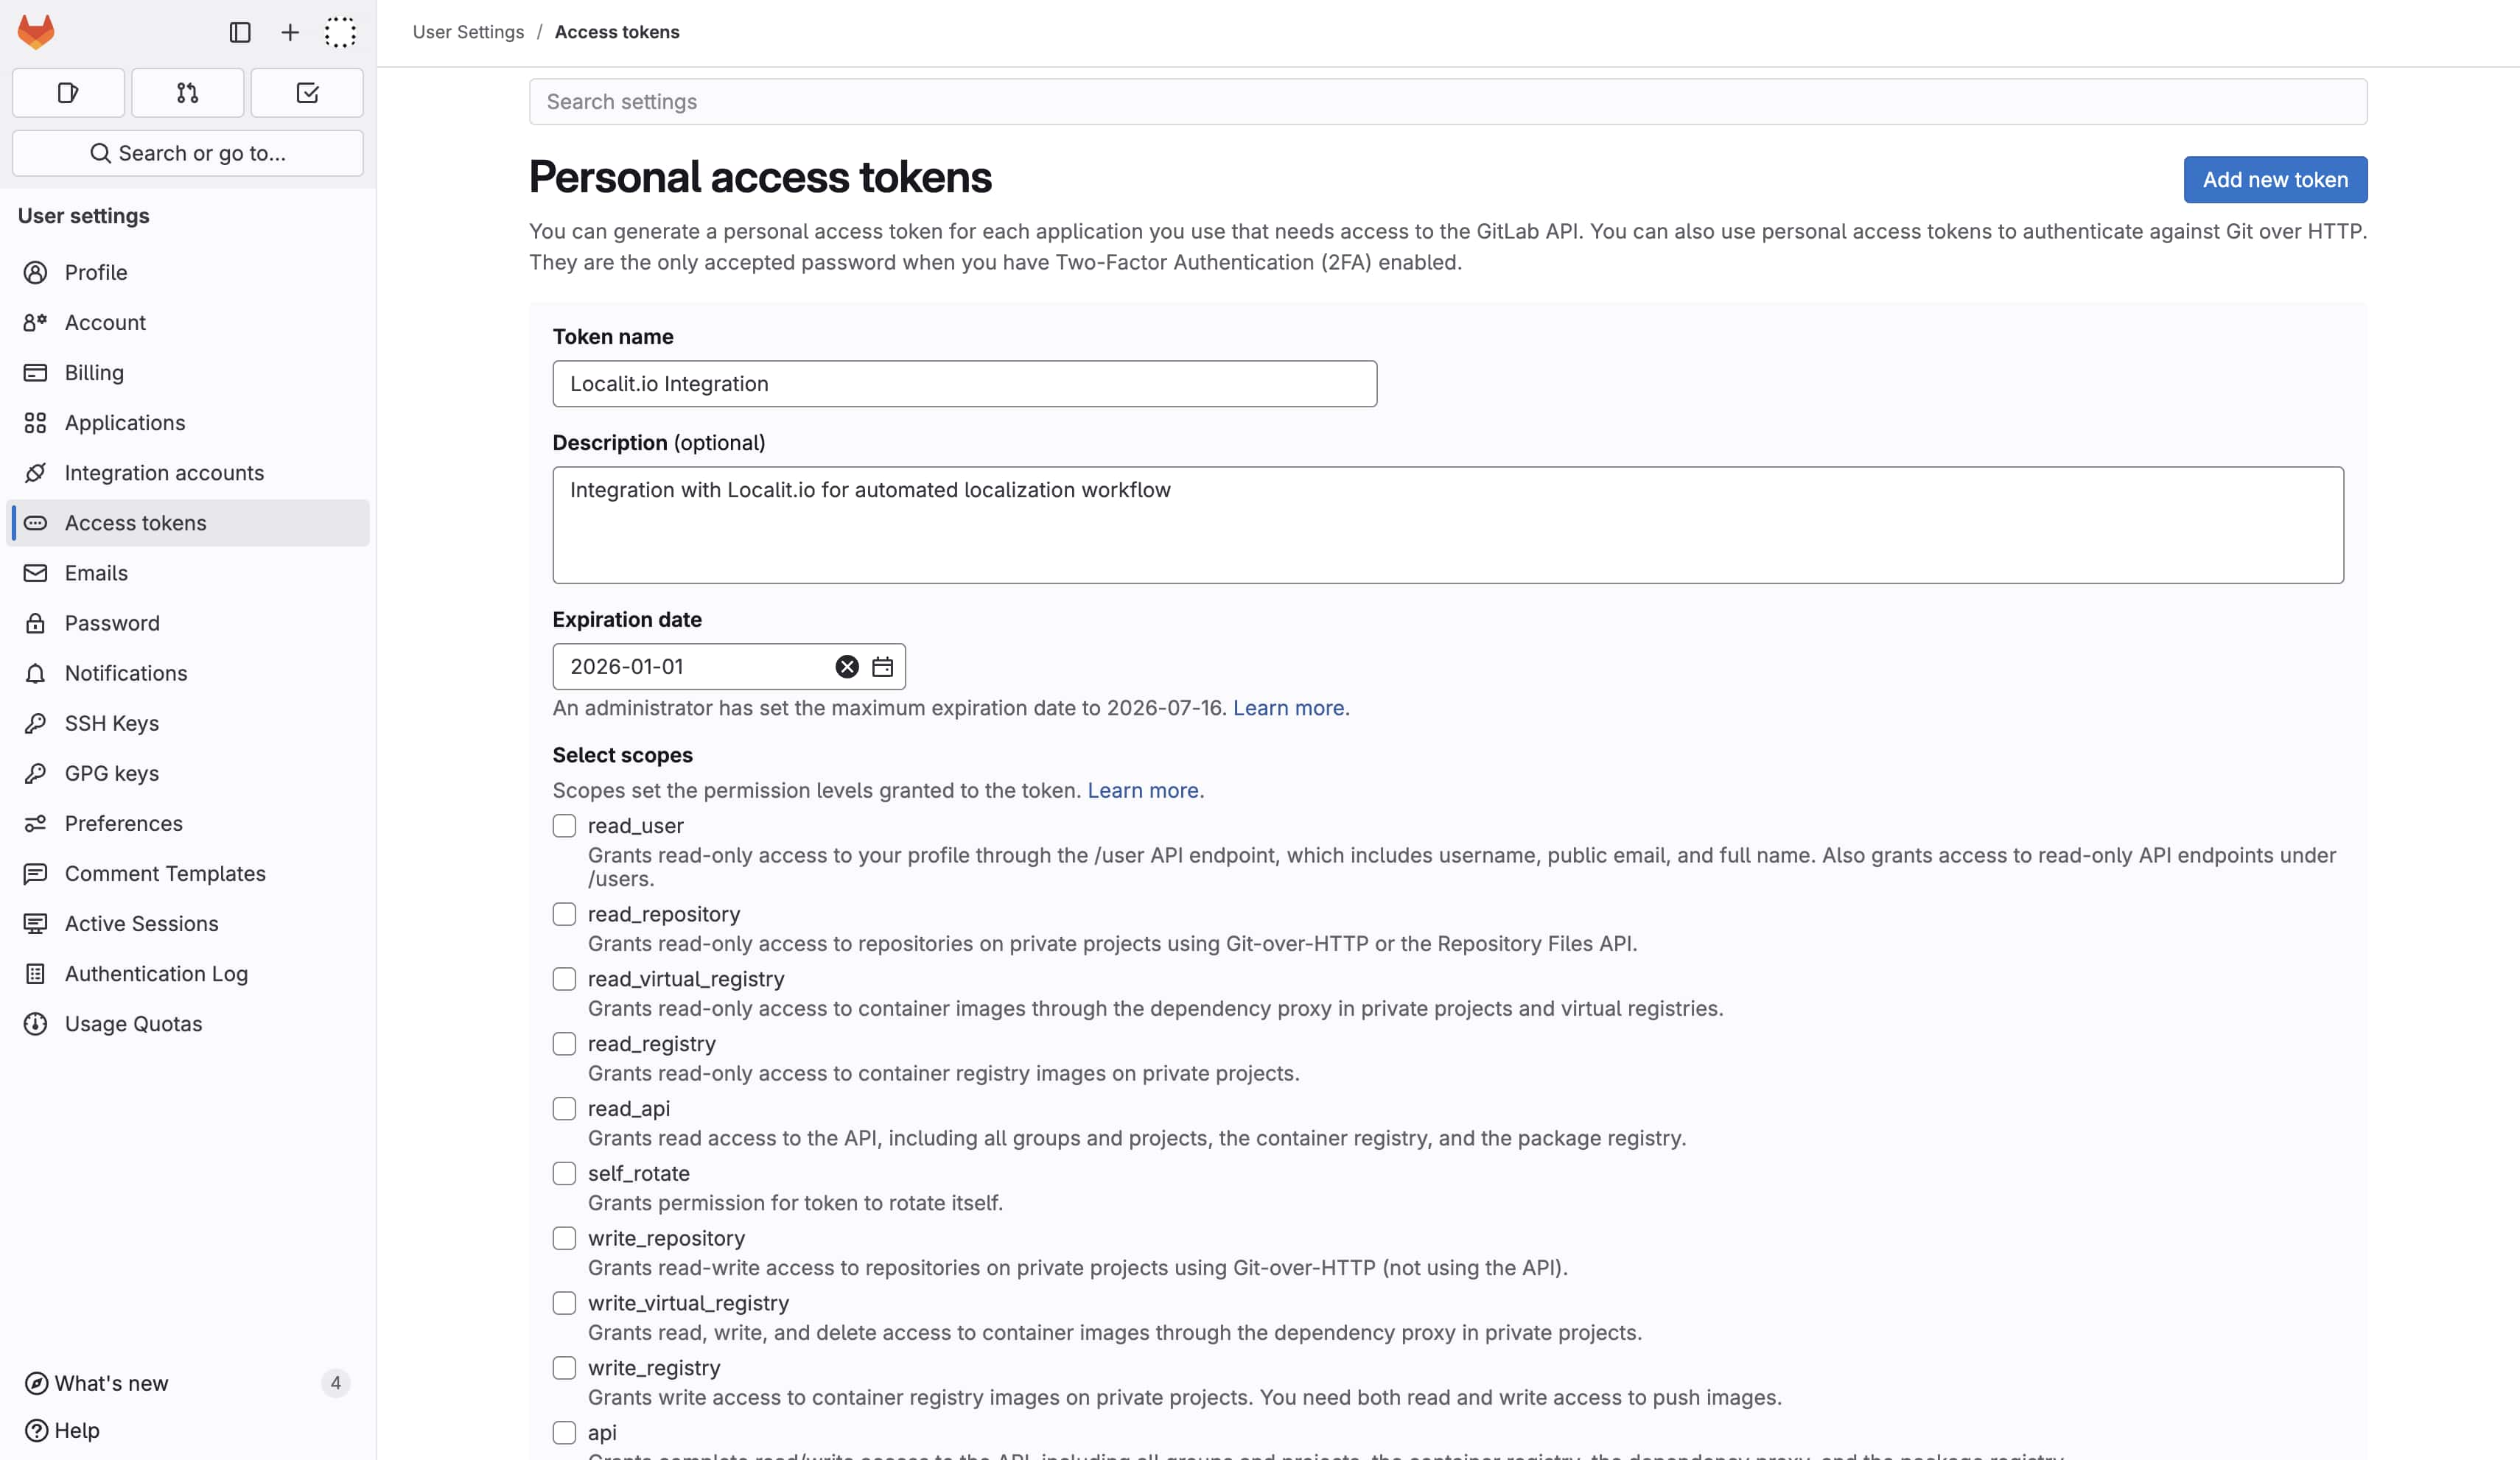
Step 4: Configure permissions (Scopes)
Required permissions:
api:
-
Purpose: Full access to GitLab API
-
Needed for: Reading and writing files, repository management

read_repository:
-
Purpose: Reading repository content
-
Needed for: Loading localization files

write_repository:
-
Purpose: Writing to repository
-
Needed for: Sending translations back to repository

read_api:
-
Purpose: Webhook access
-
Needed for: Automatic synchronization on changes

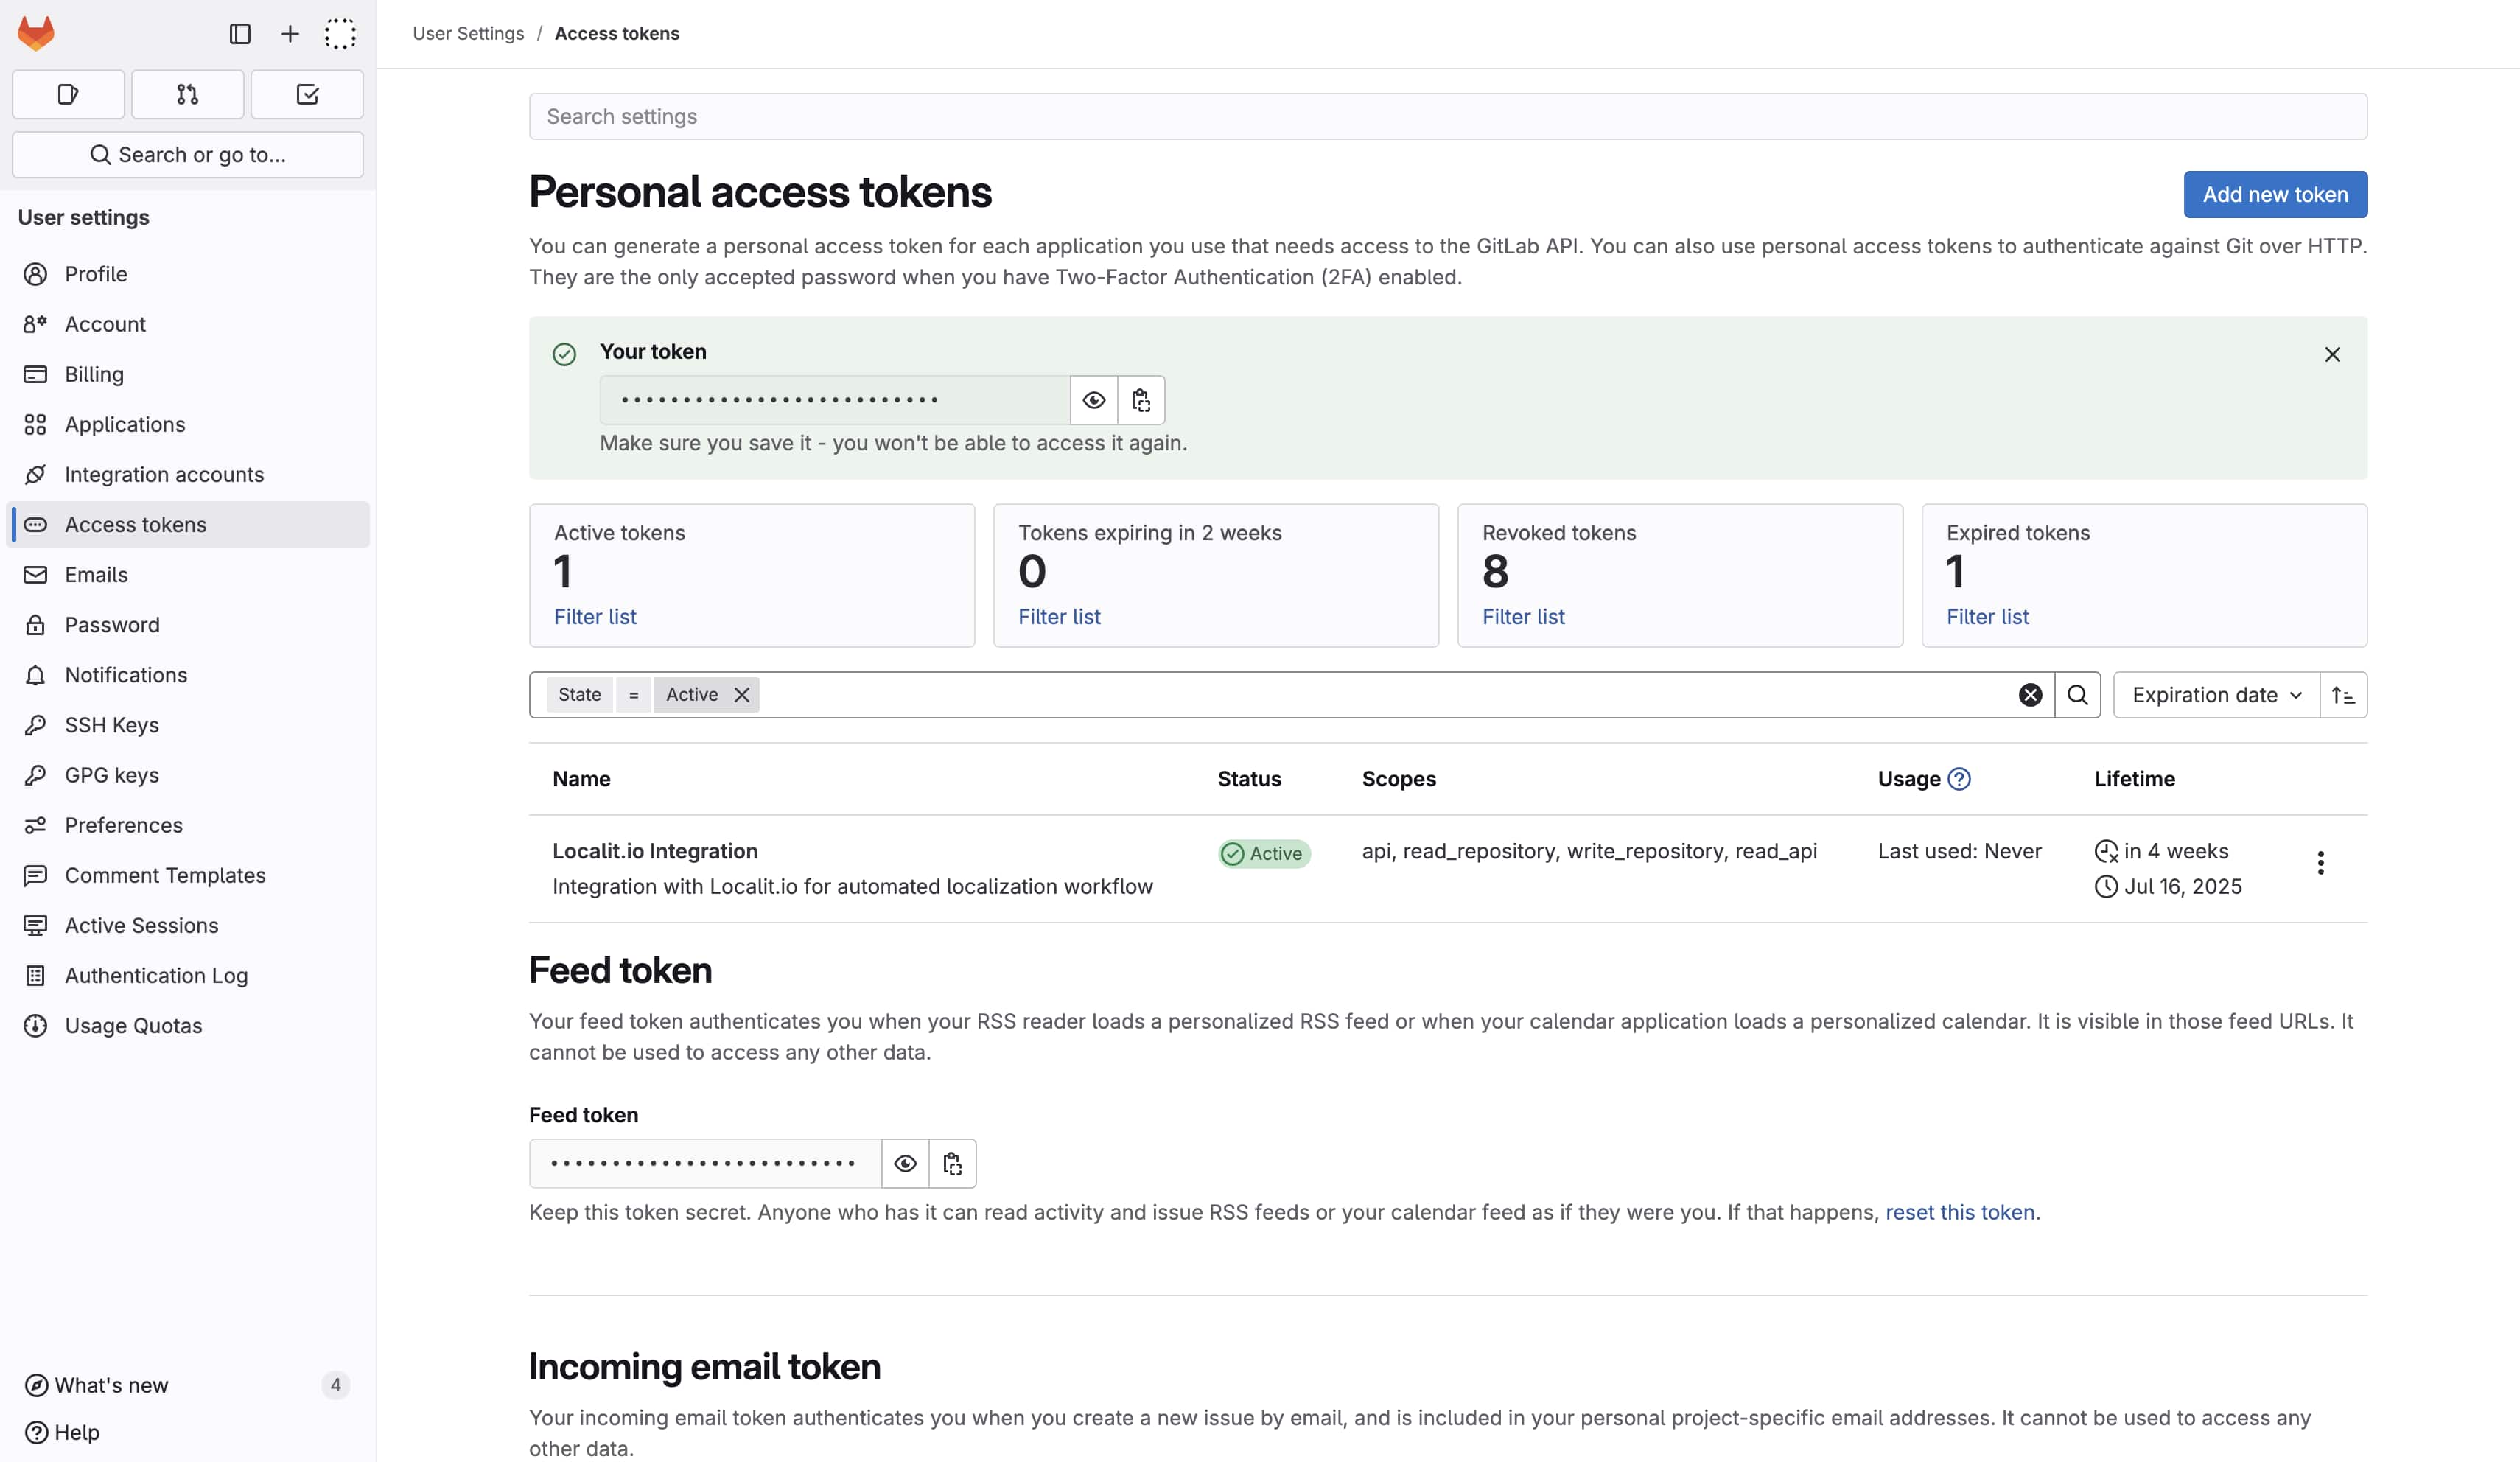
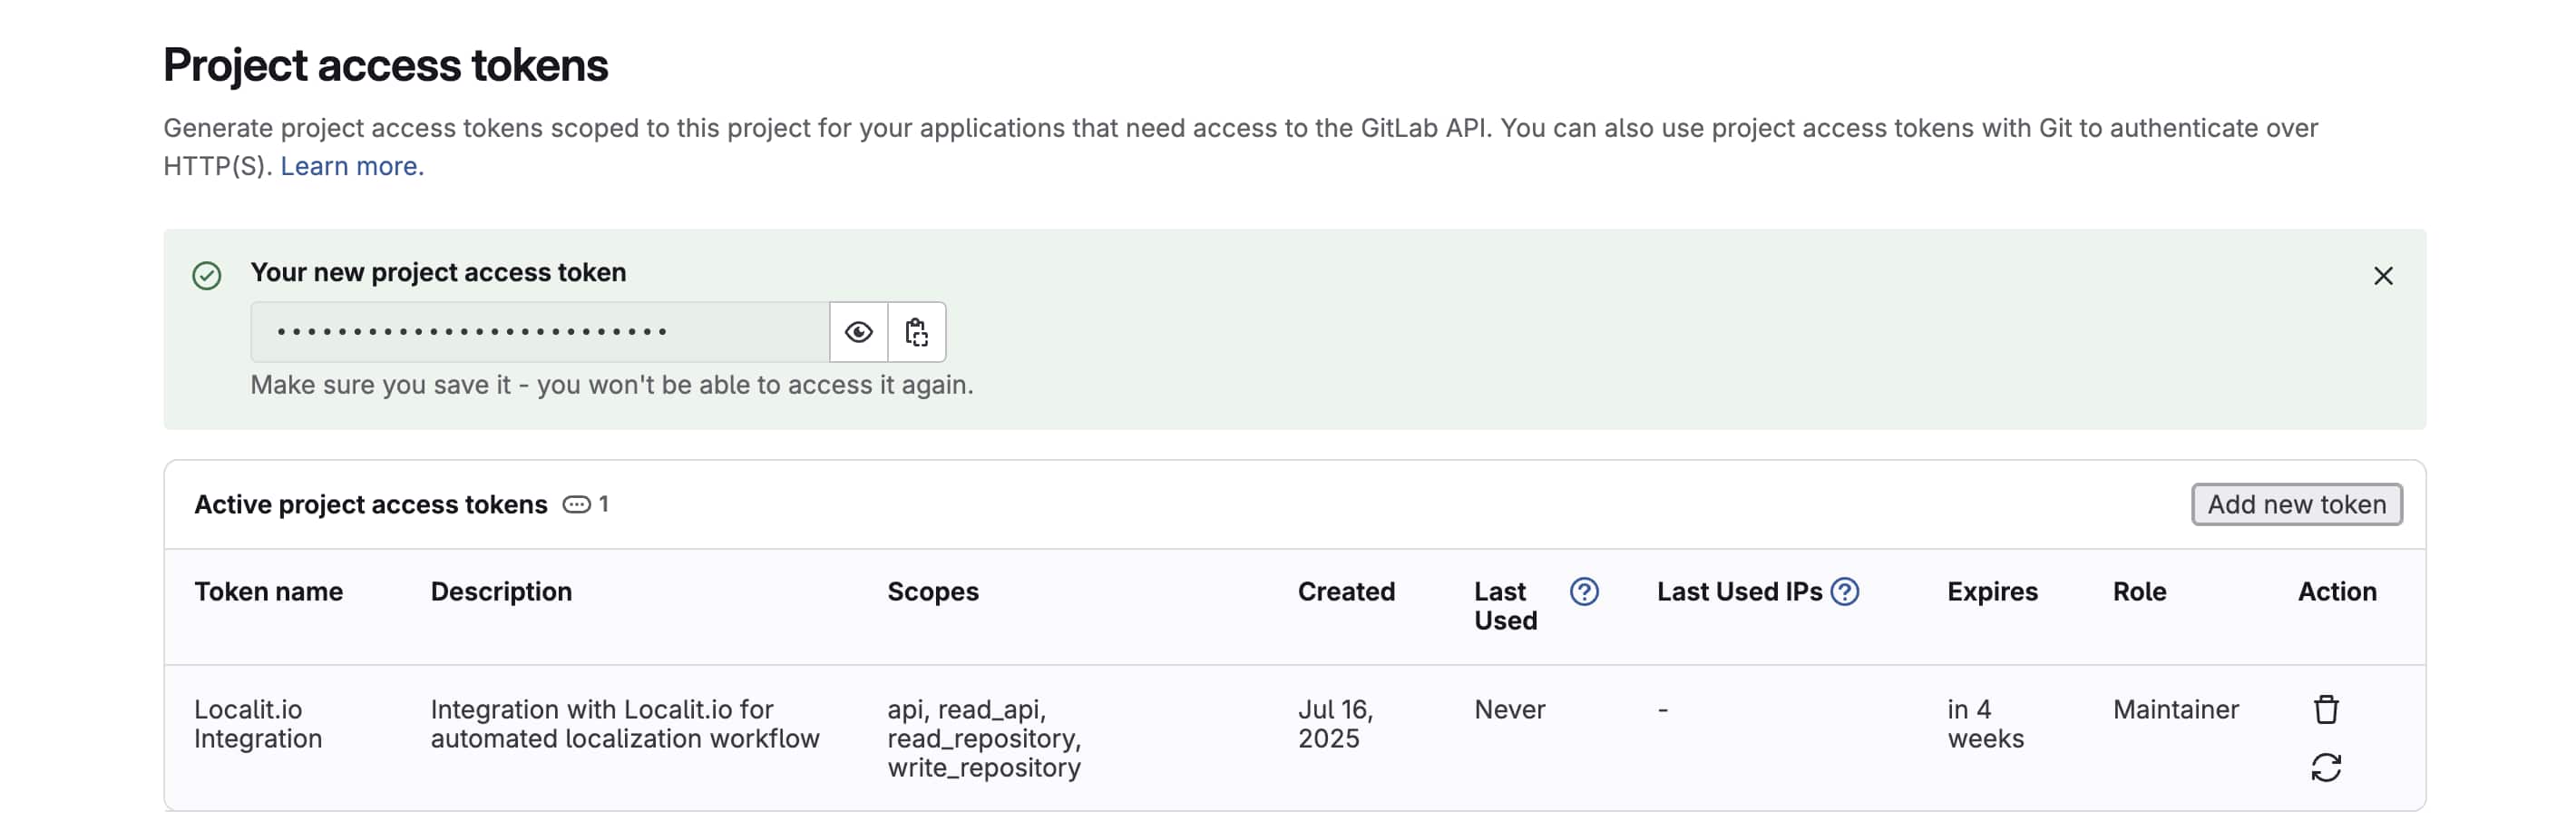
Step 5: Create and copy token
-
Click "Create personal access token"
-
Important: Copy the token immediately — it won't be shown again
-
Save the token in a secure location
Creating Project Access Token (Recommended)
More secure method for specific projects
Project Access Token limits access to only one project, enhancing security.
Step 1: Navigate to project settings
-
Open the required project in GitLab
-
Go to Settings → Access Tokens
-
Find "Project Access Tokens" section
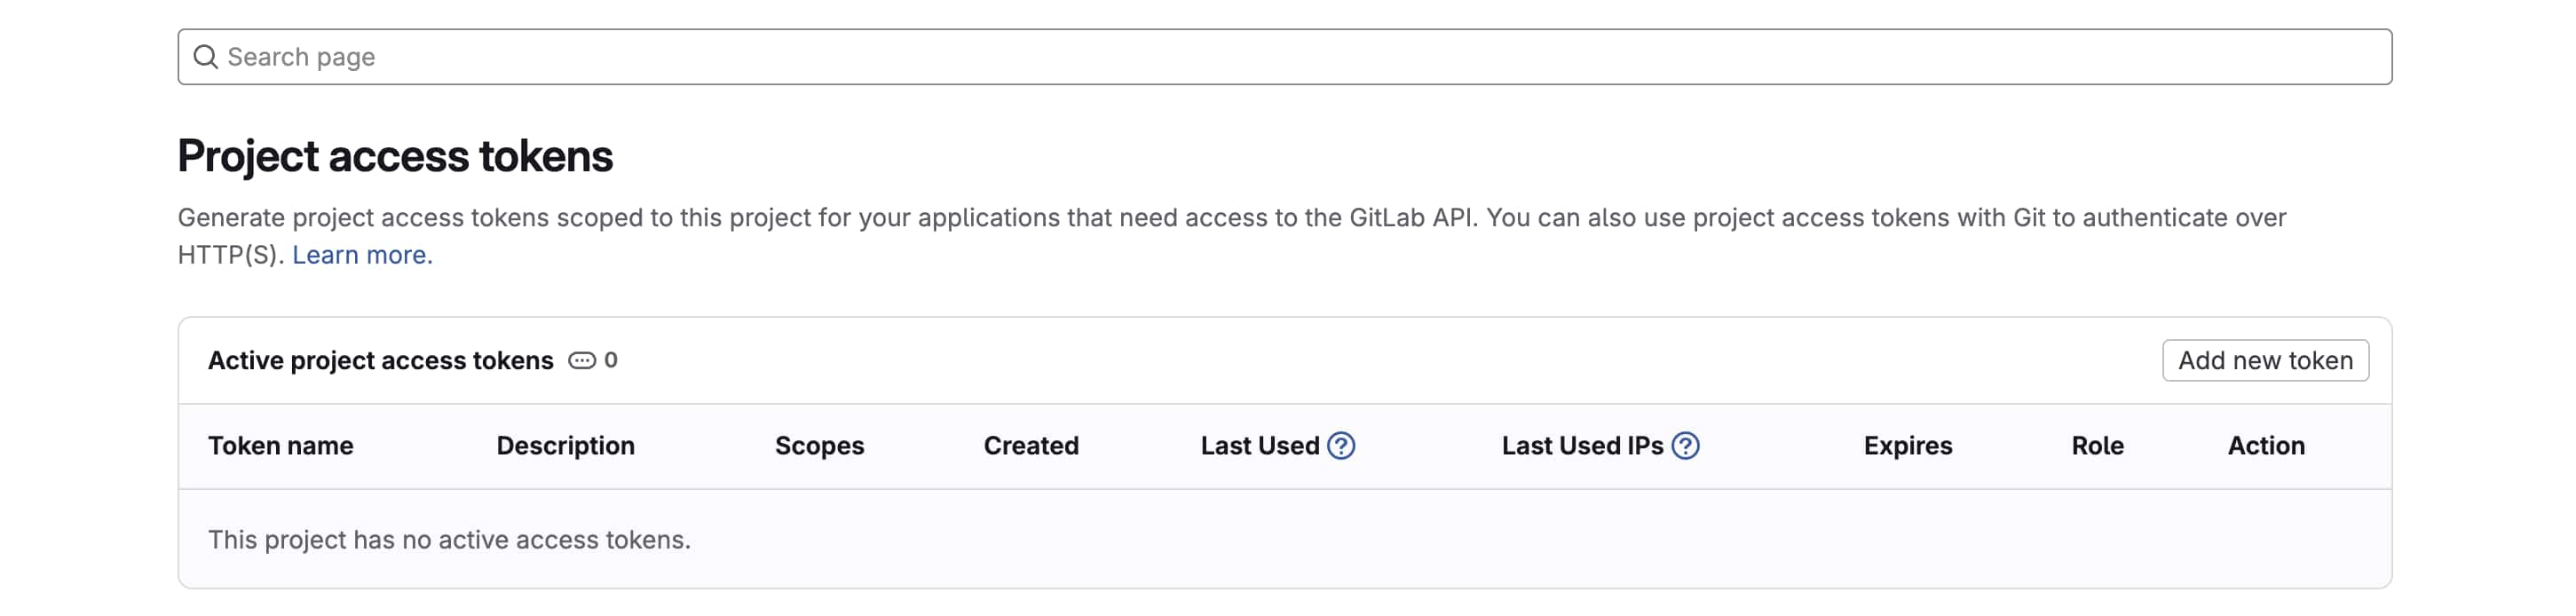
Step 2: Create Project token
-
Click "Add new token"
-
Fill in token parameters
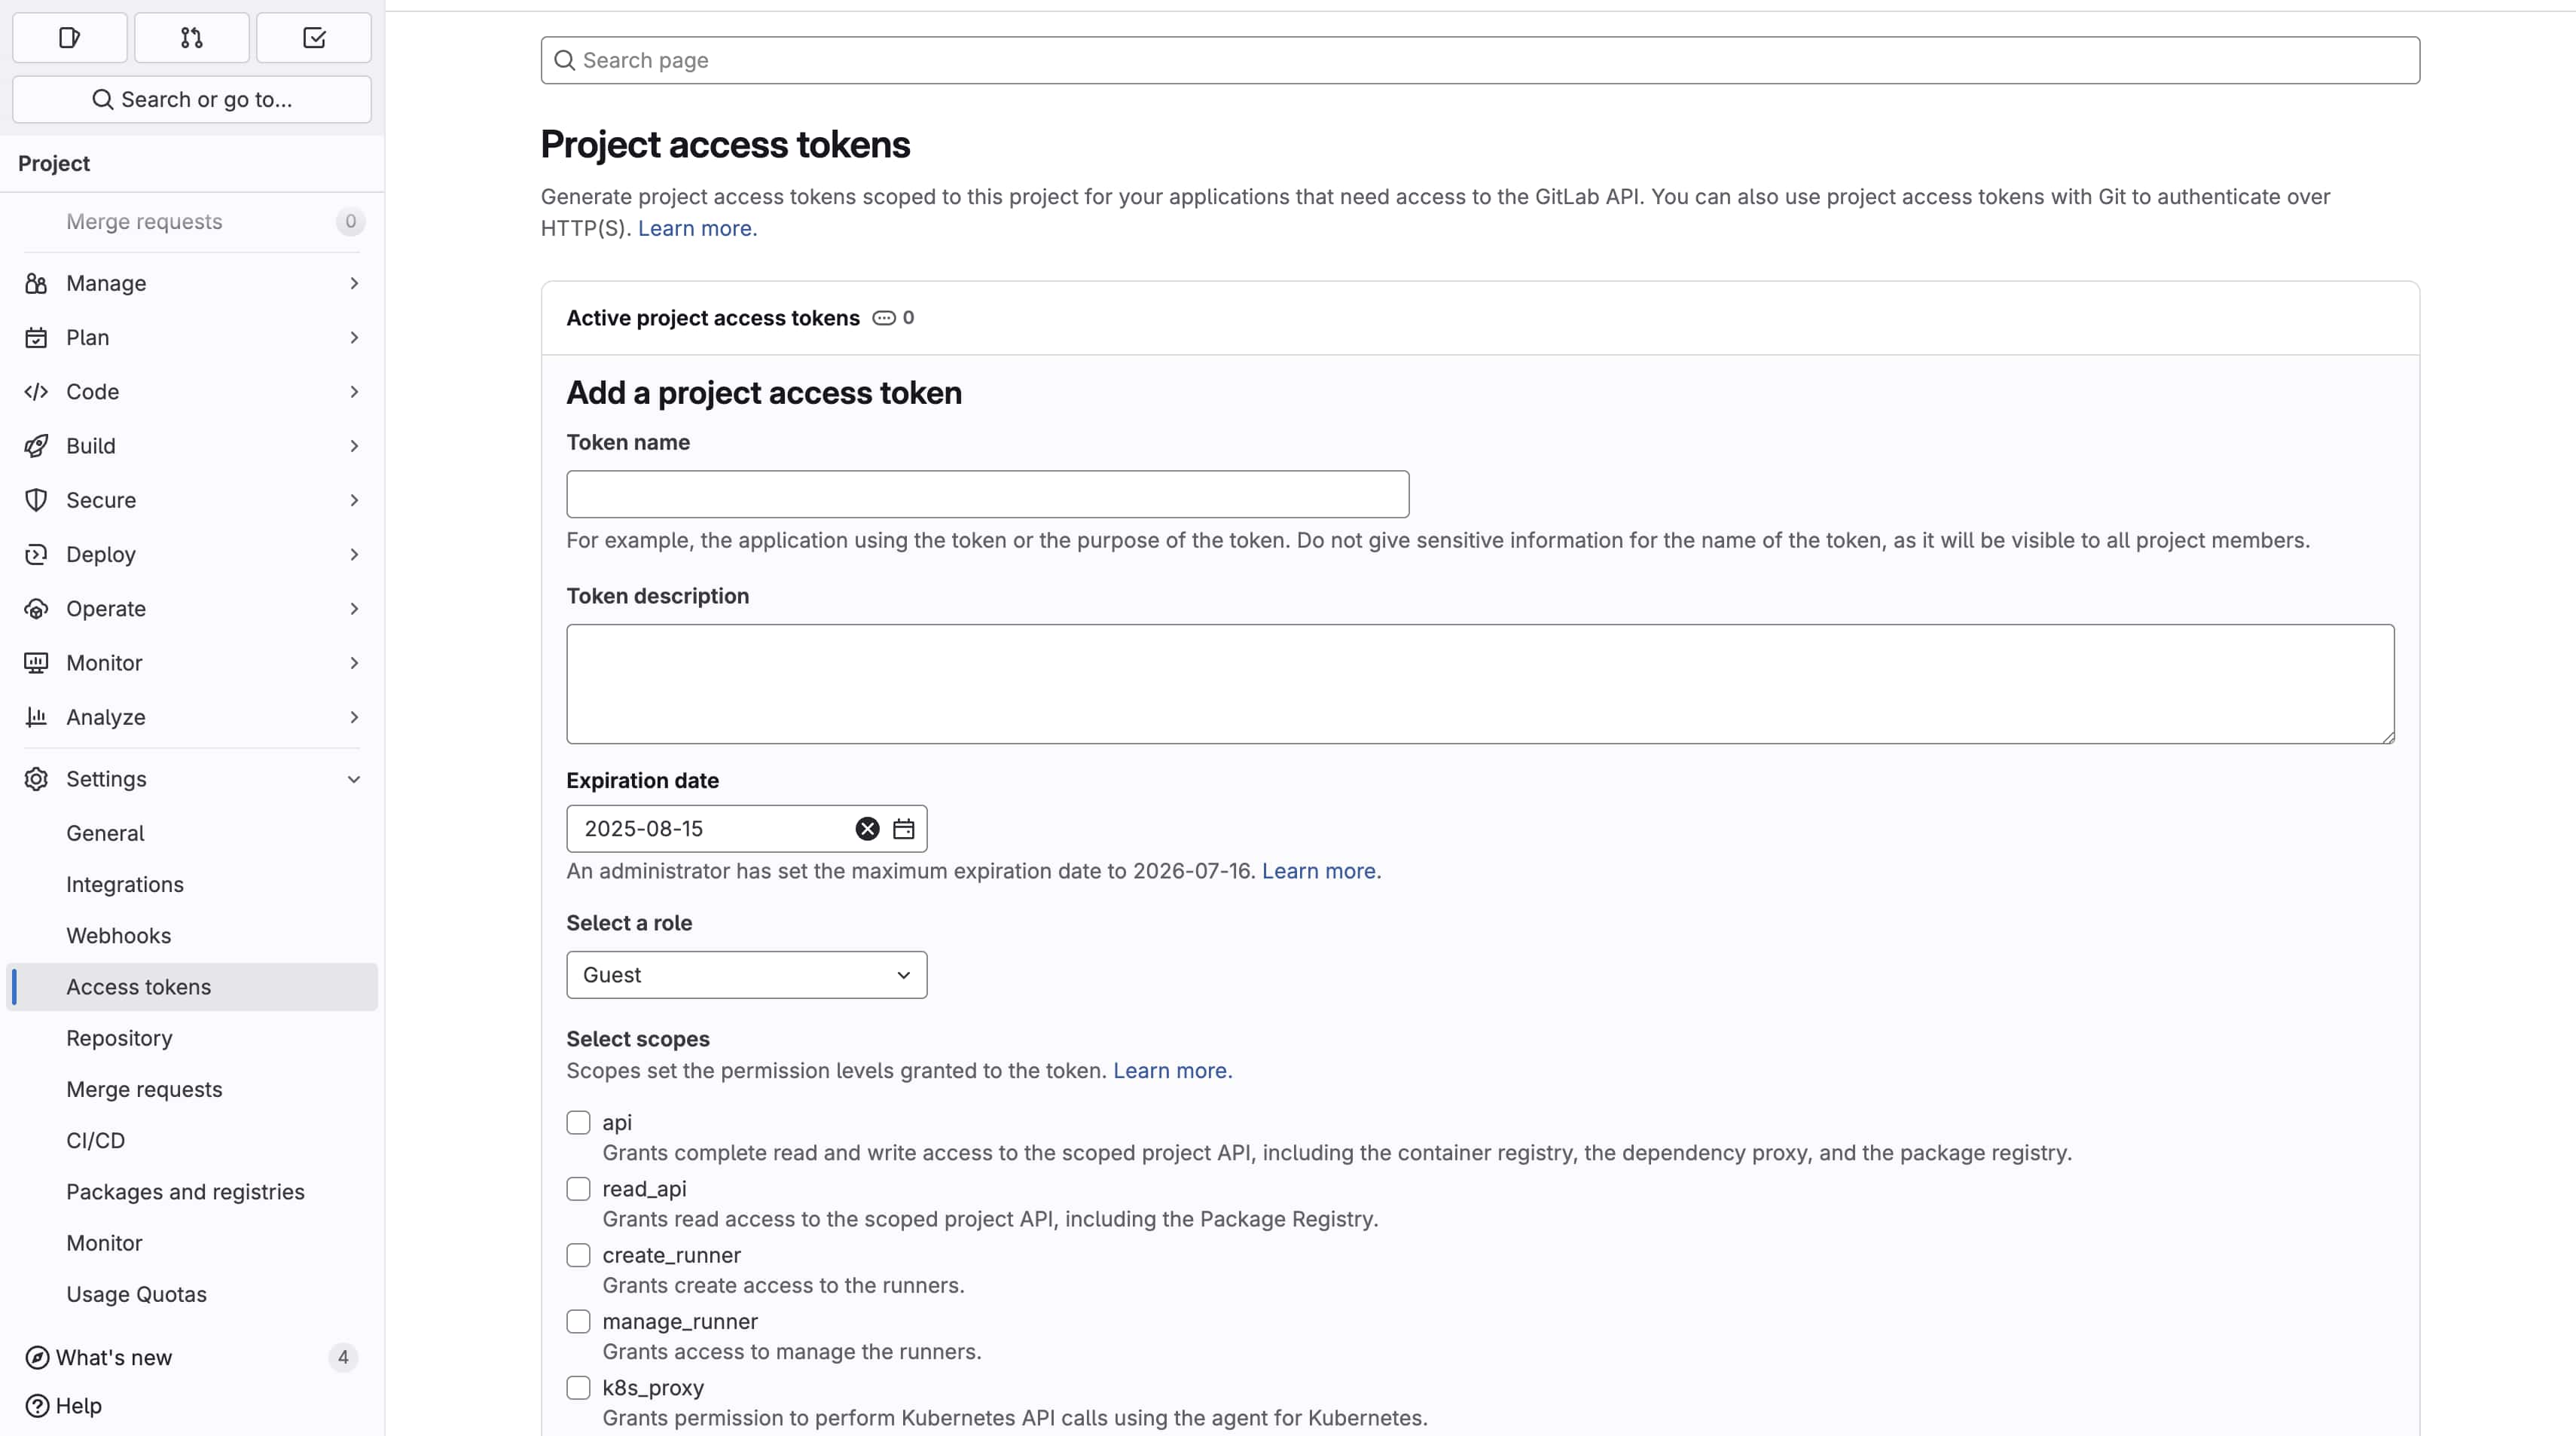
Step 3: Configure Project token
Token name: Localit.io Integration Expiration date: No expiration (recommended) Role: Maintainer (minimum) or Owner
Required permissions (Scopes):
api:
Full access to GitLab API
read_repository:
Reading repository content
write_repository:
Writing to repository
read_api:
Webhook access for automatic synchronization
Step 4: Create and save token
-
Click "Create project access token"
-
Immediately copy the created token
-
Save the token in a secure location
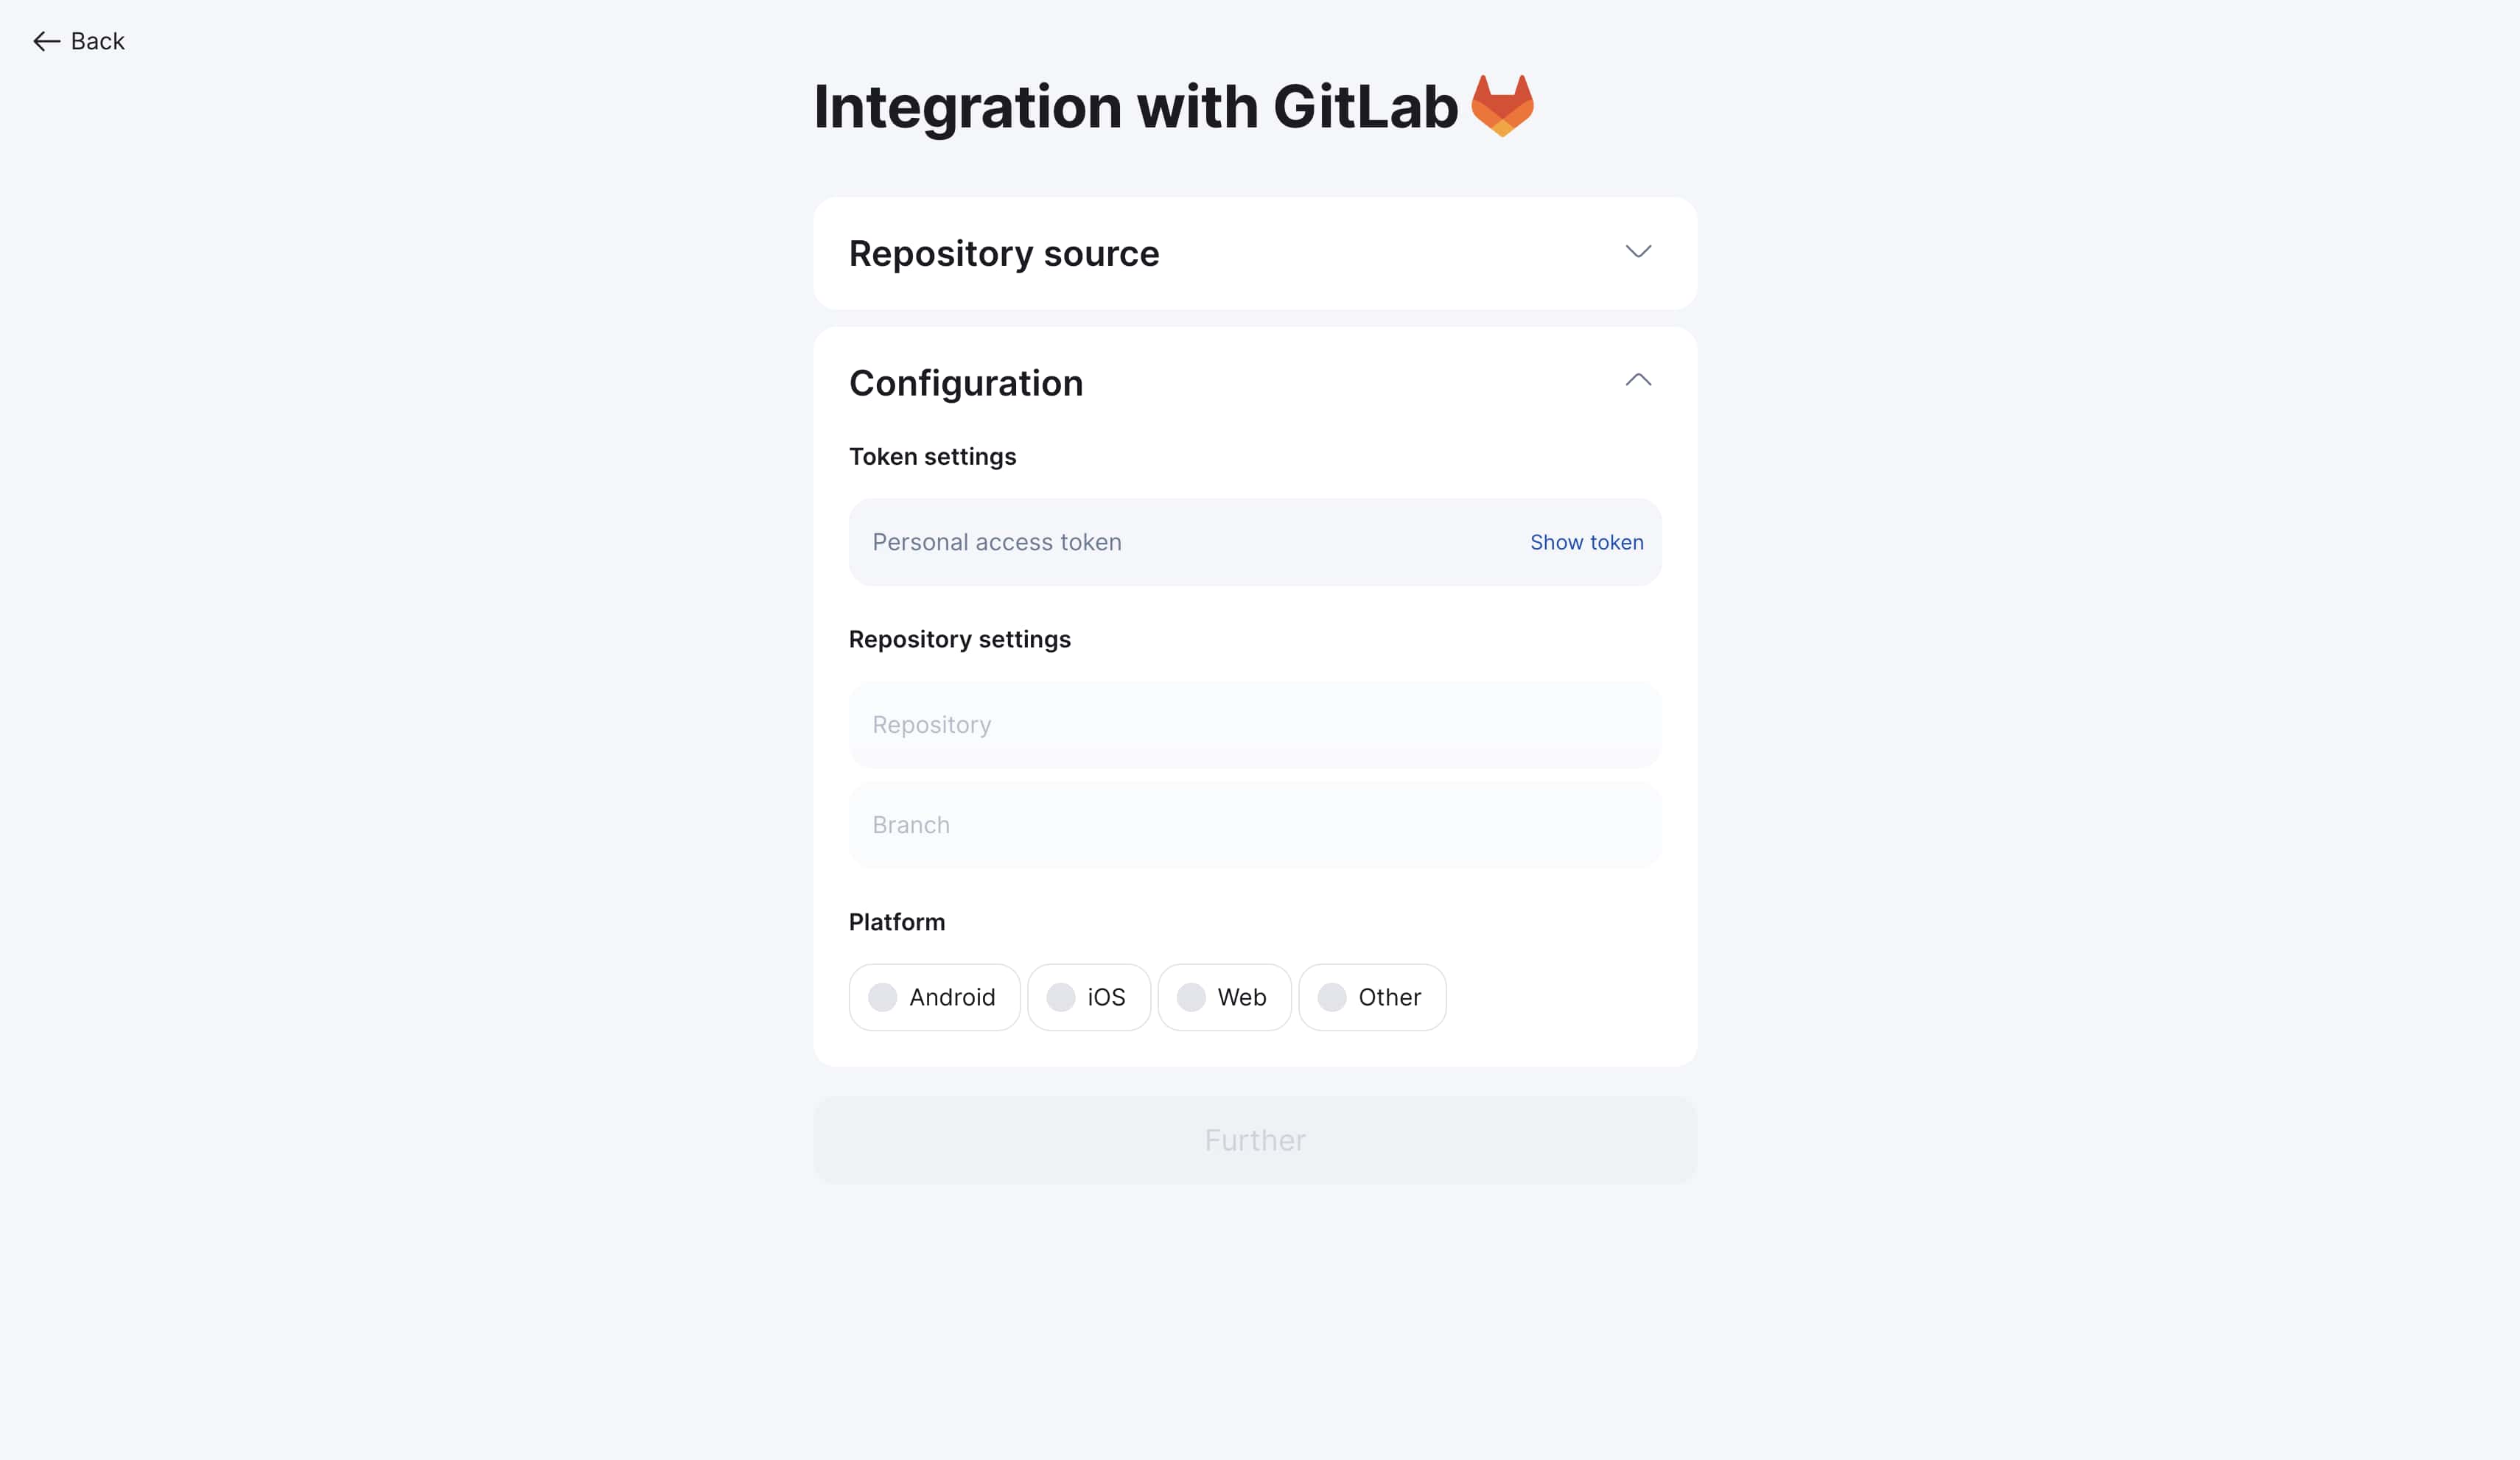
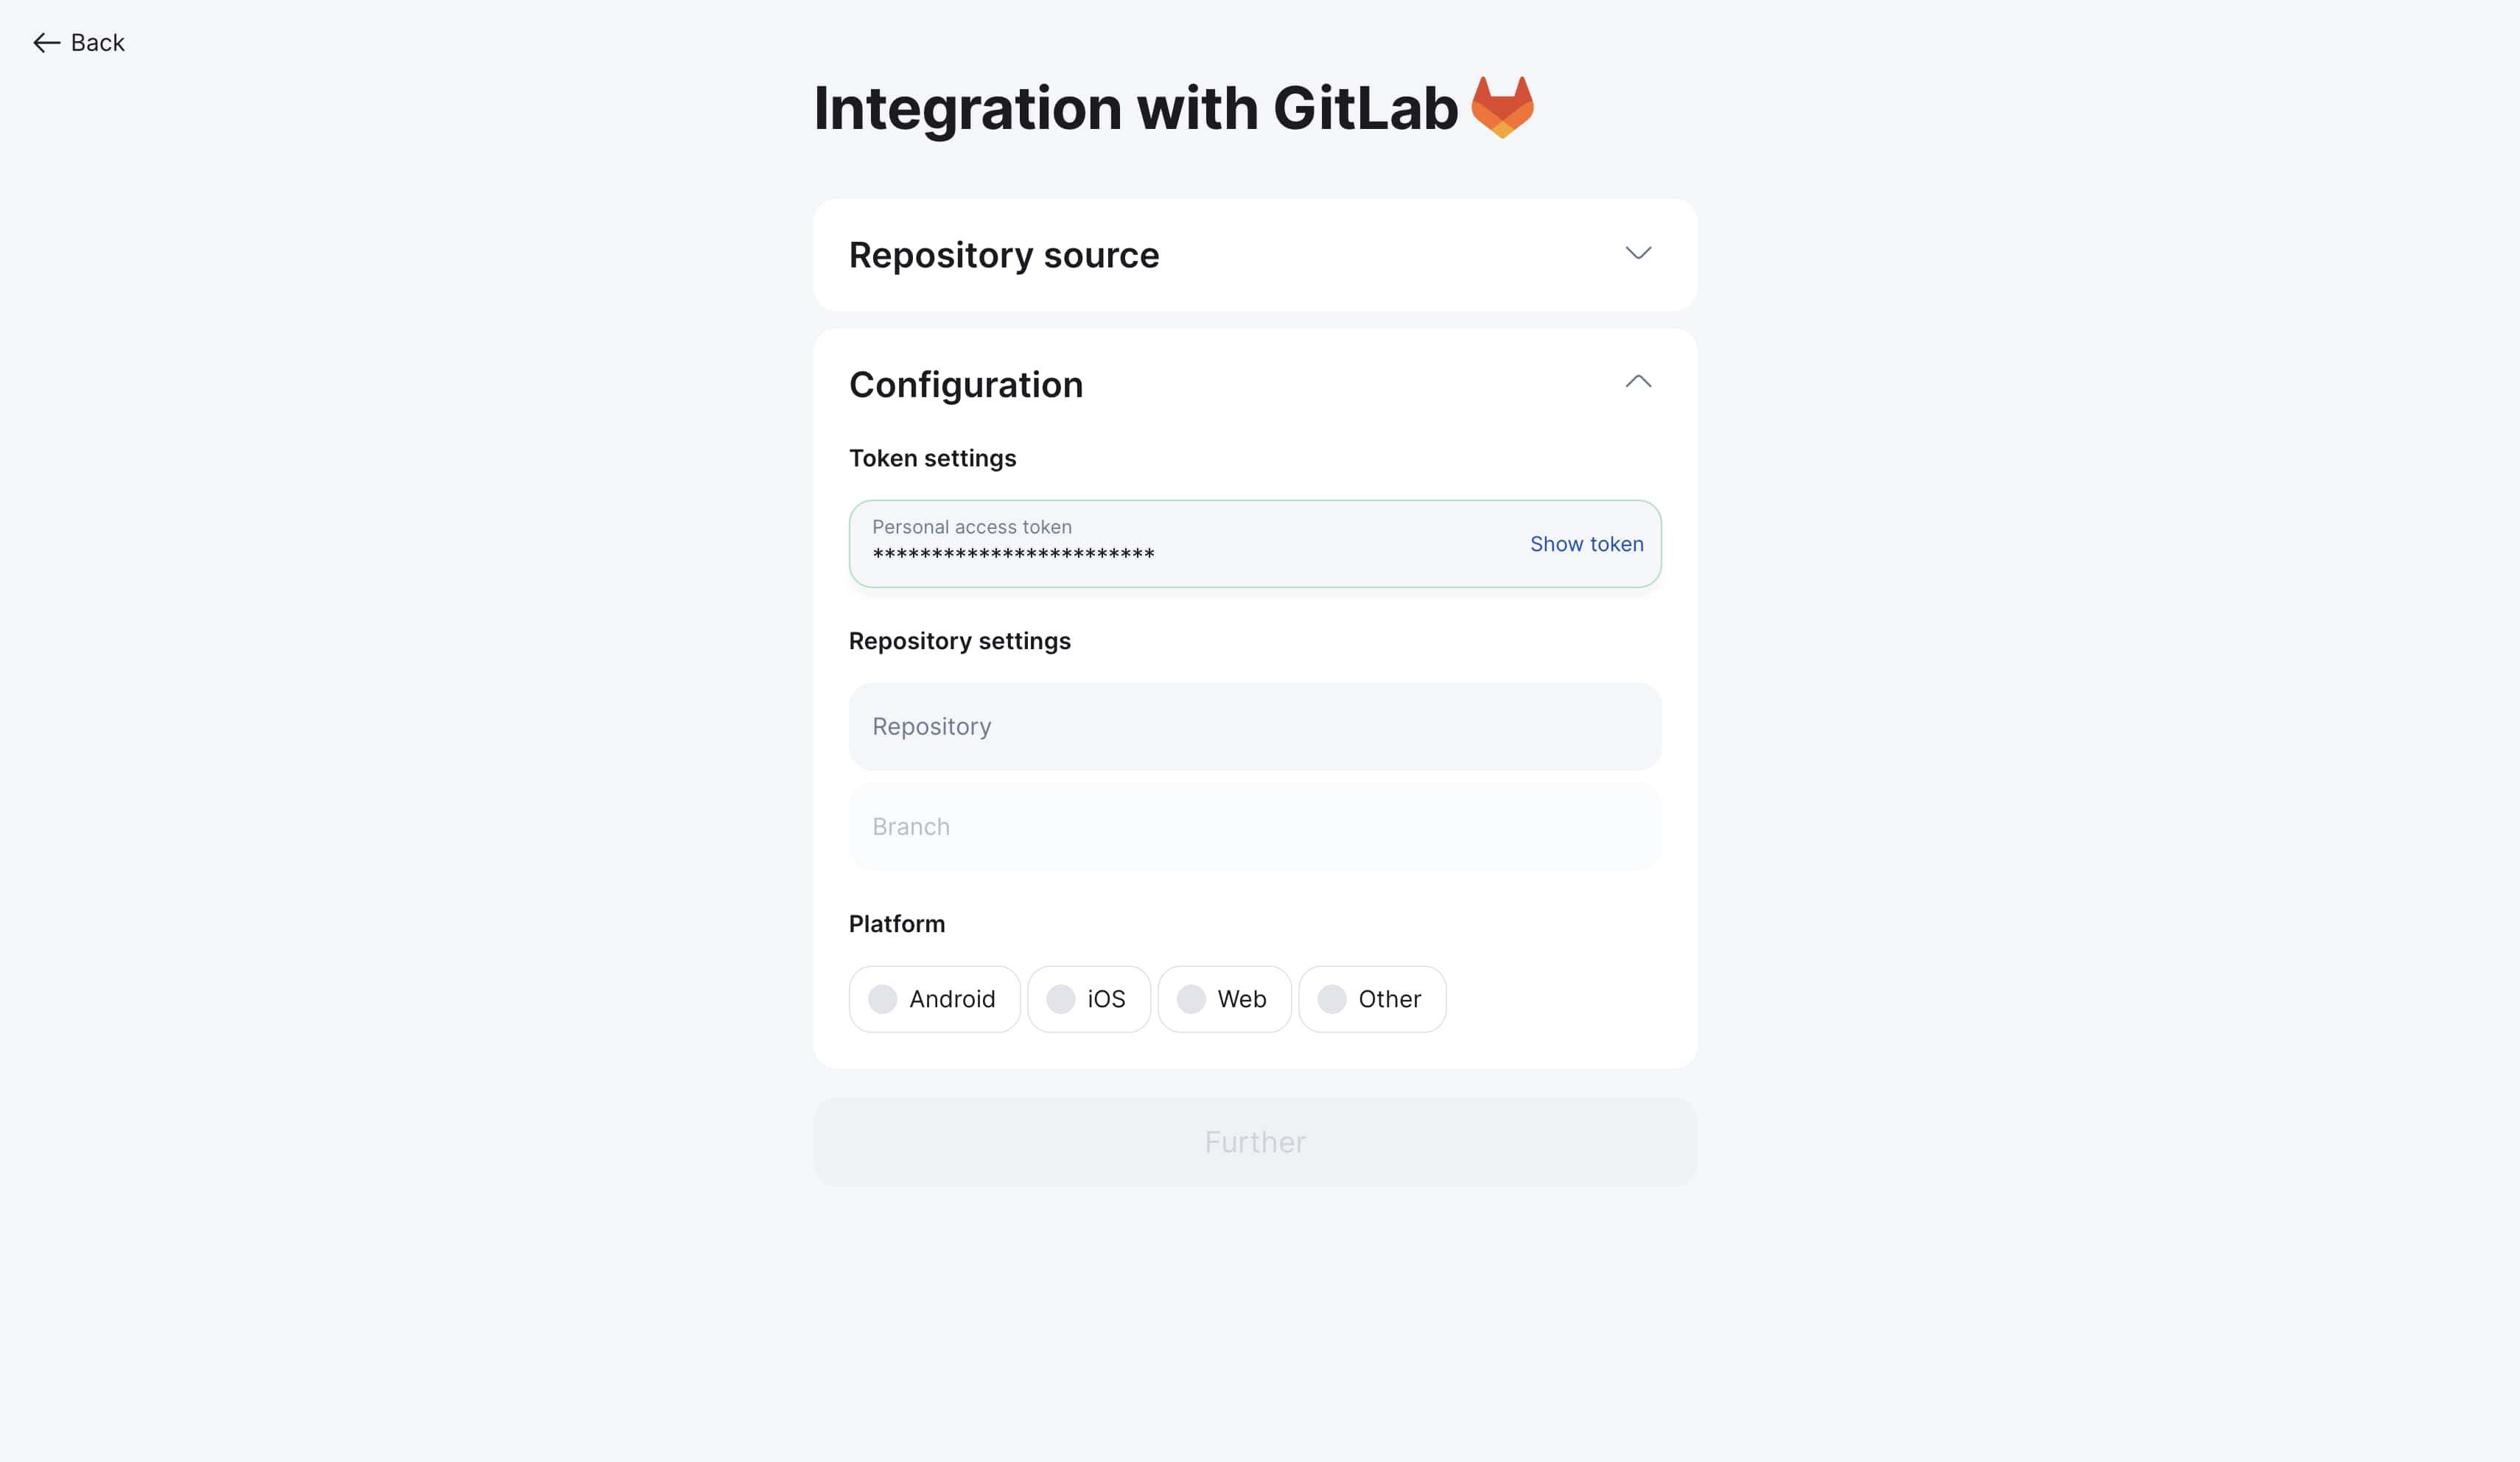
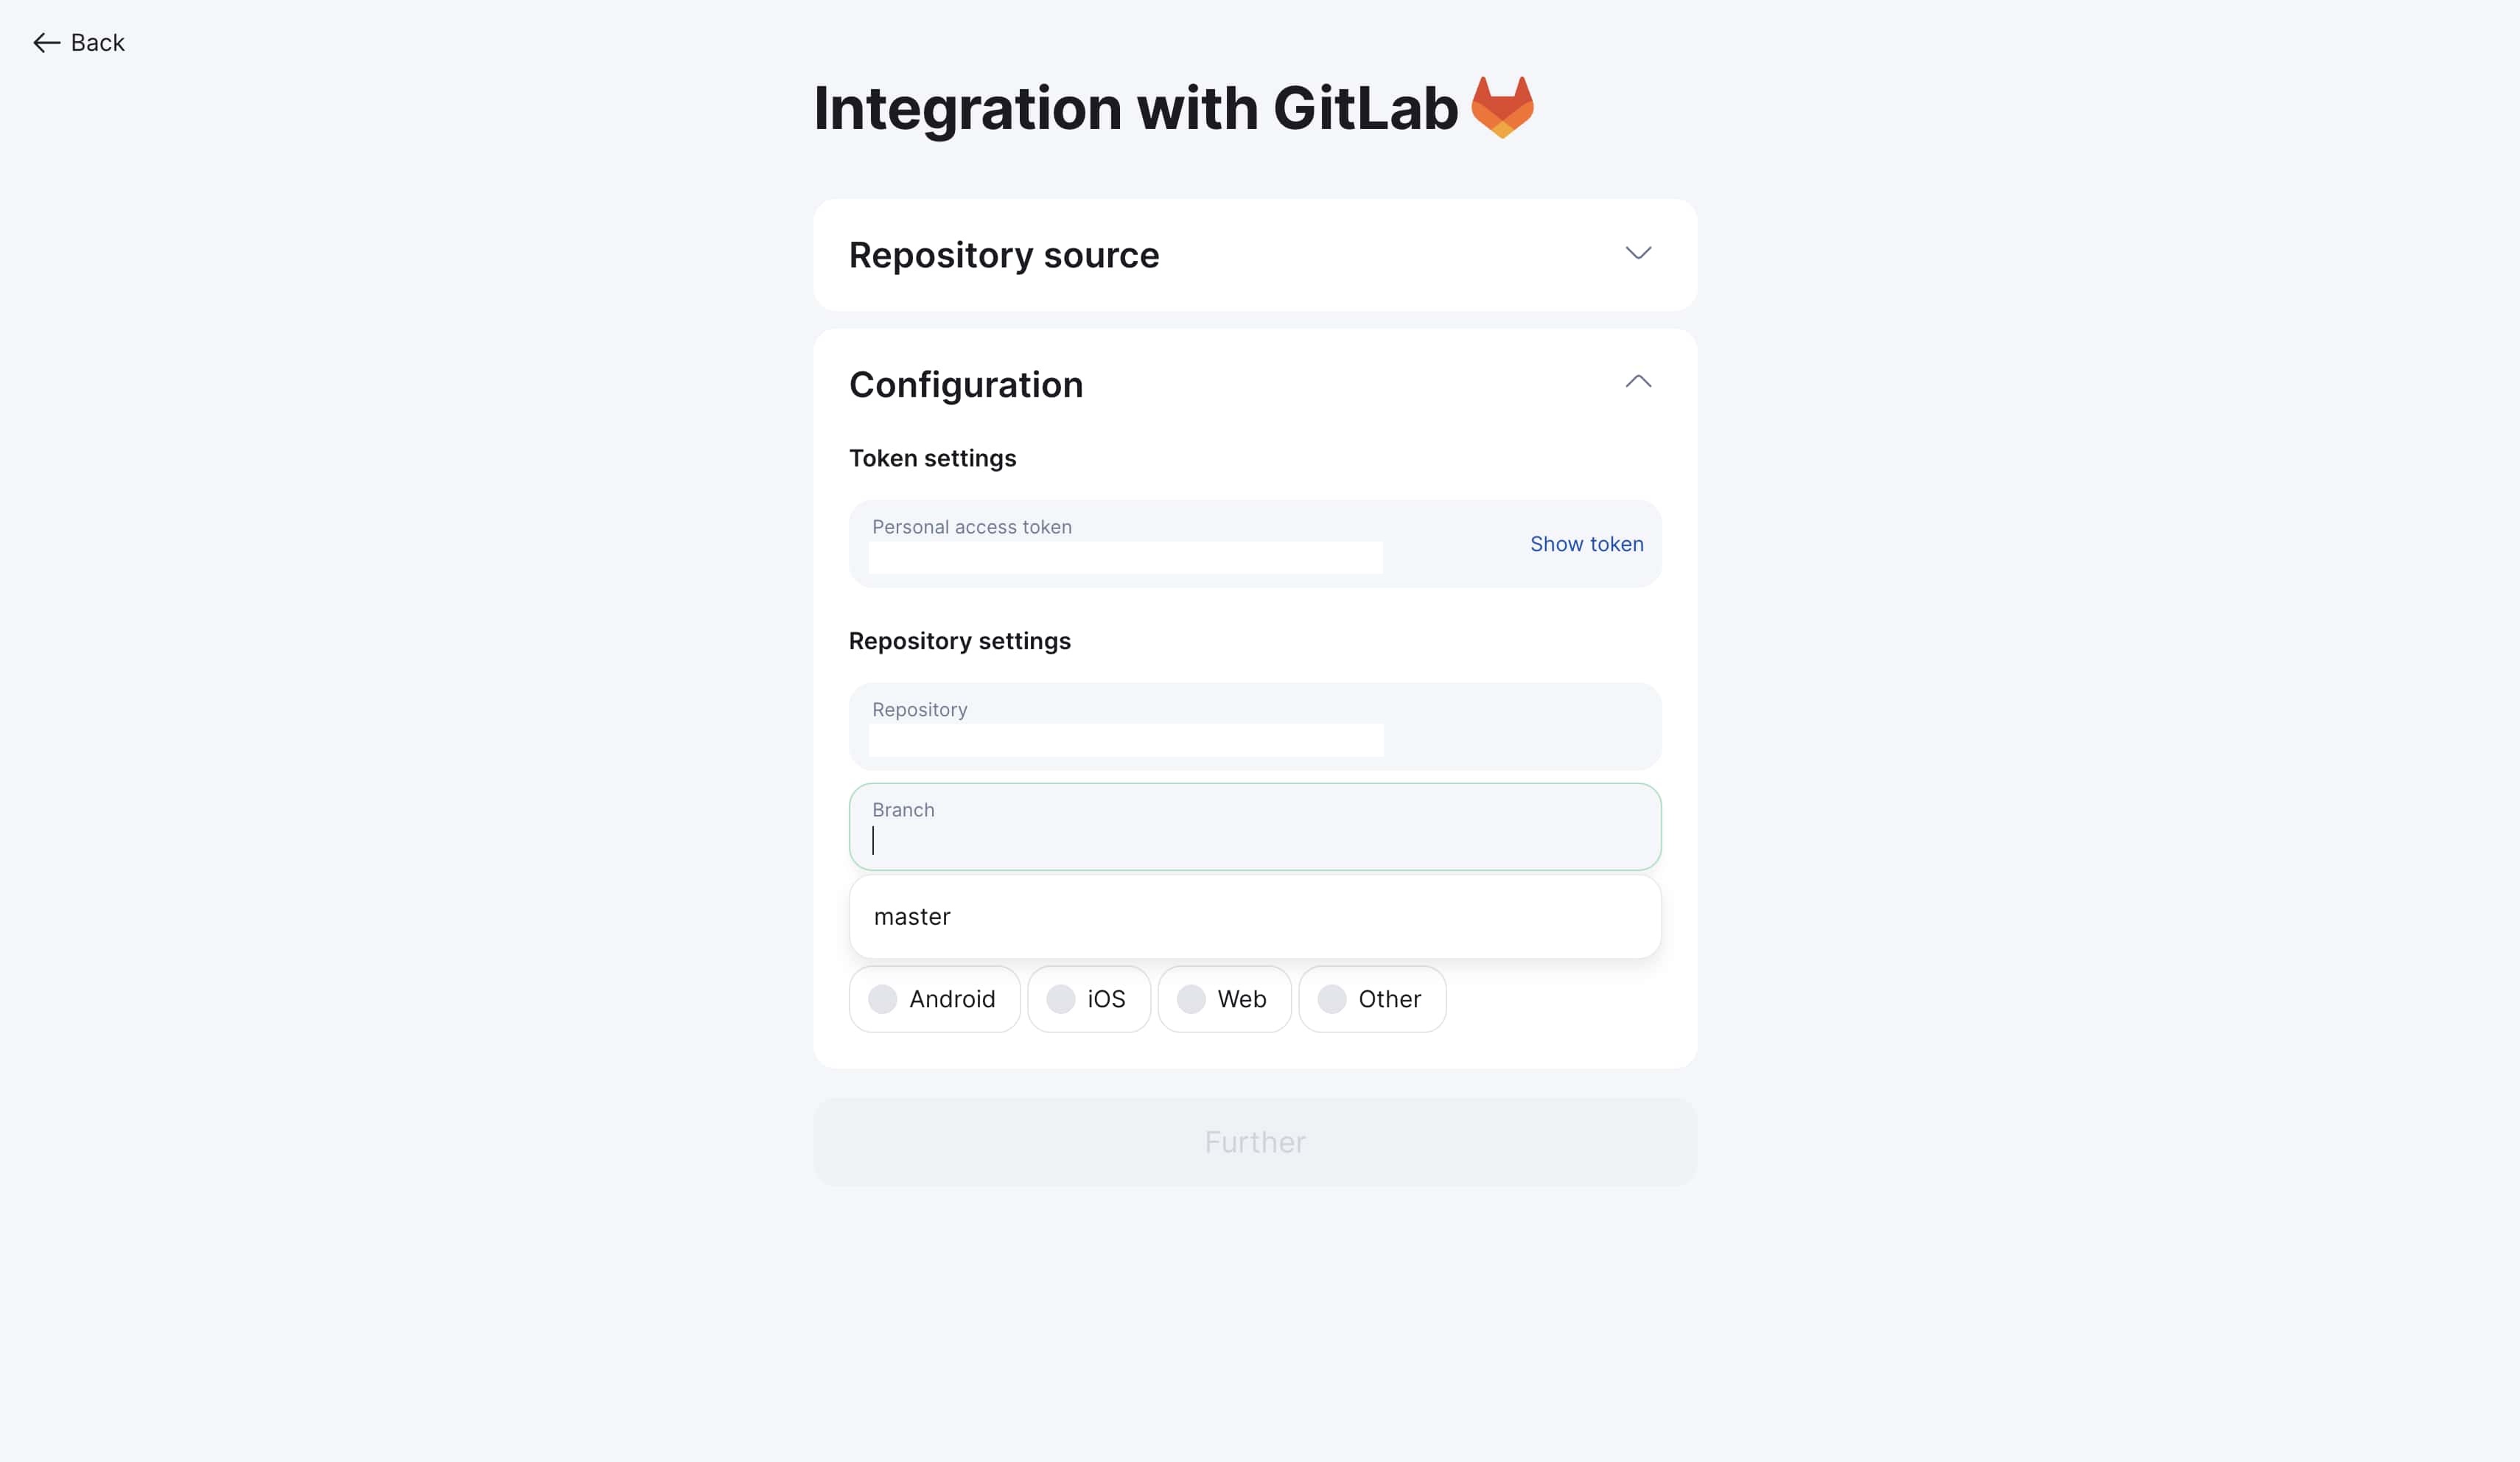
Configuring connection parameters in Localit.io
Step 1: Enter token
-
Return to Localit.io interface
-
Paste the copied token into "Personal access token" field
-
System automatically validates the token
Step 2: Select repository
-
Choose target repository from dropdown list
-
Search by name available for convenience
-
Only accessible repositories are displayed
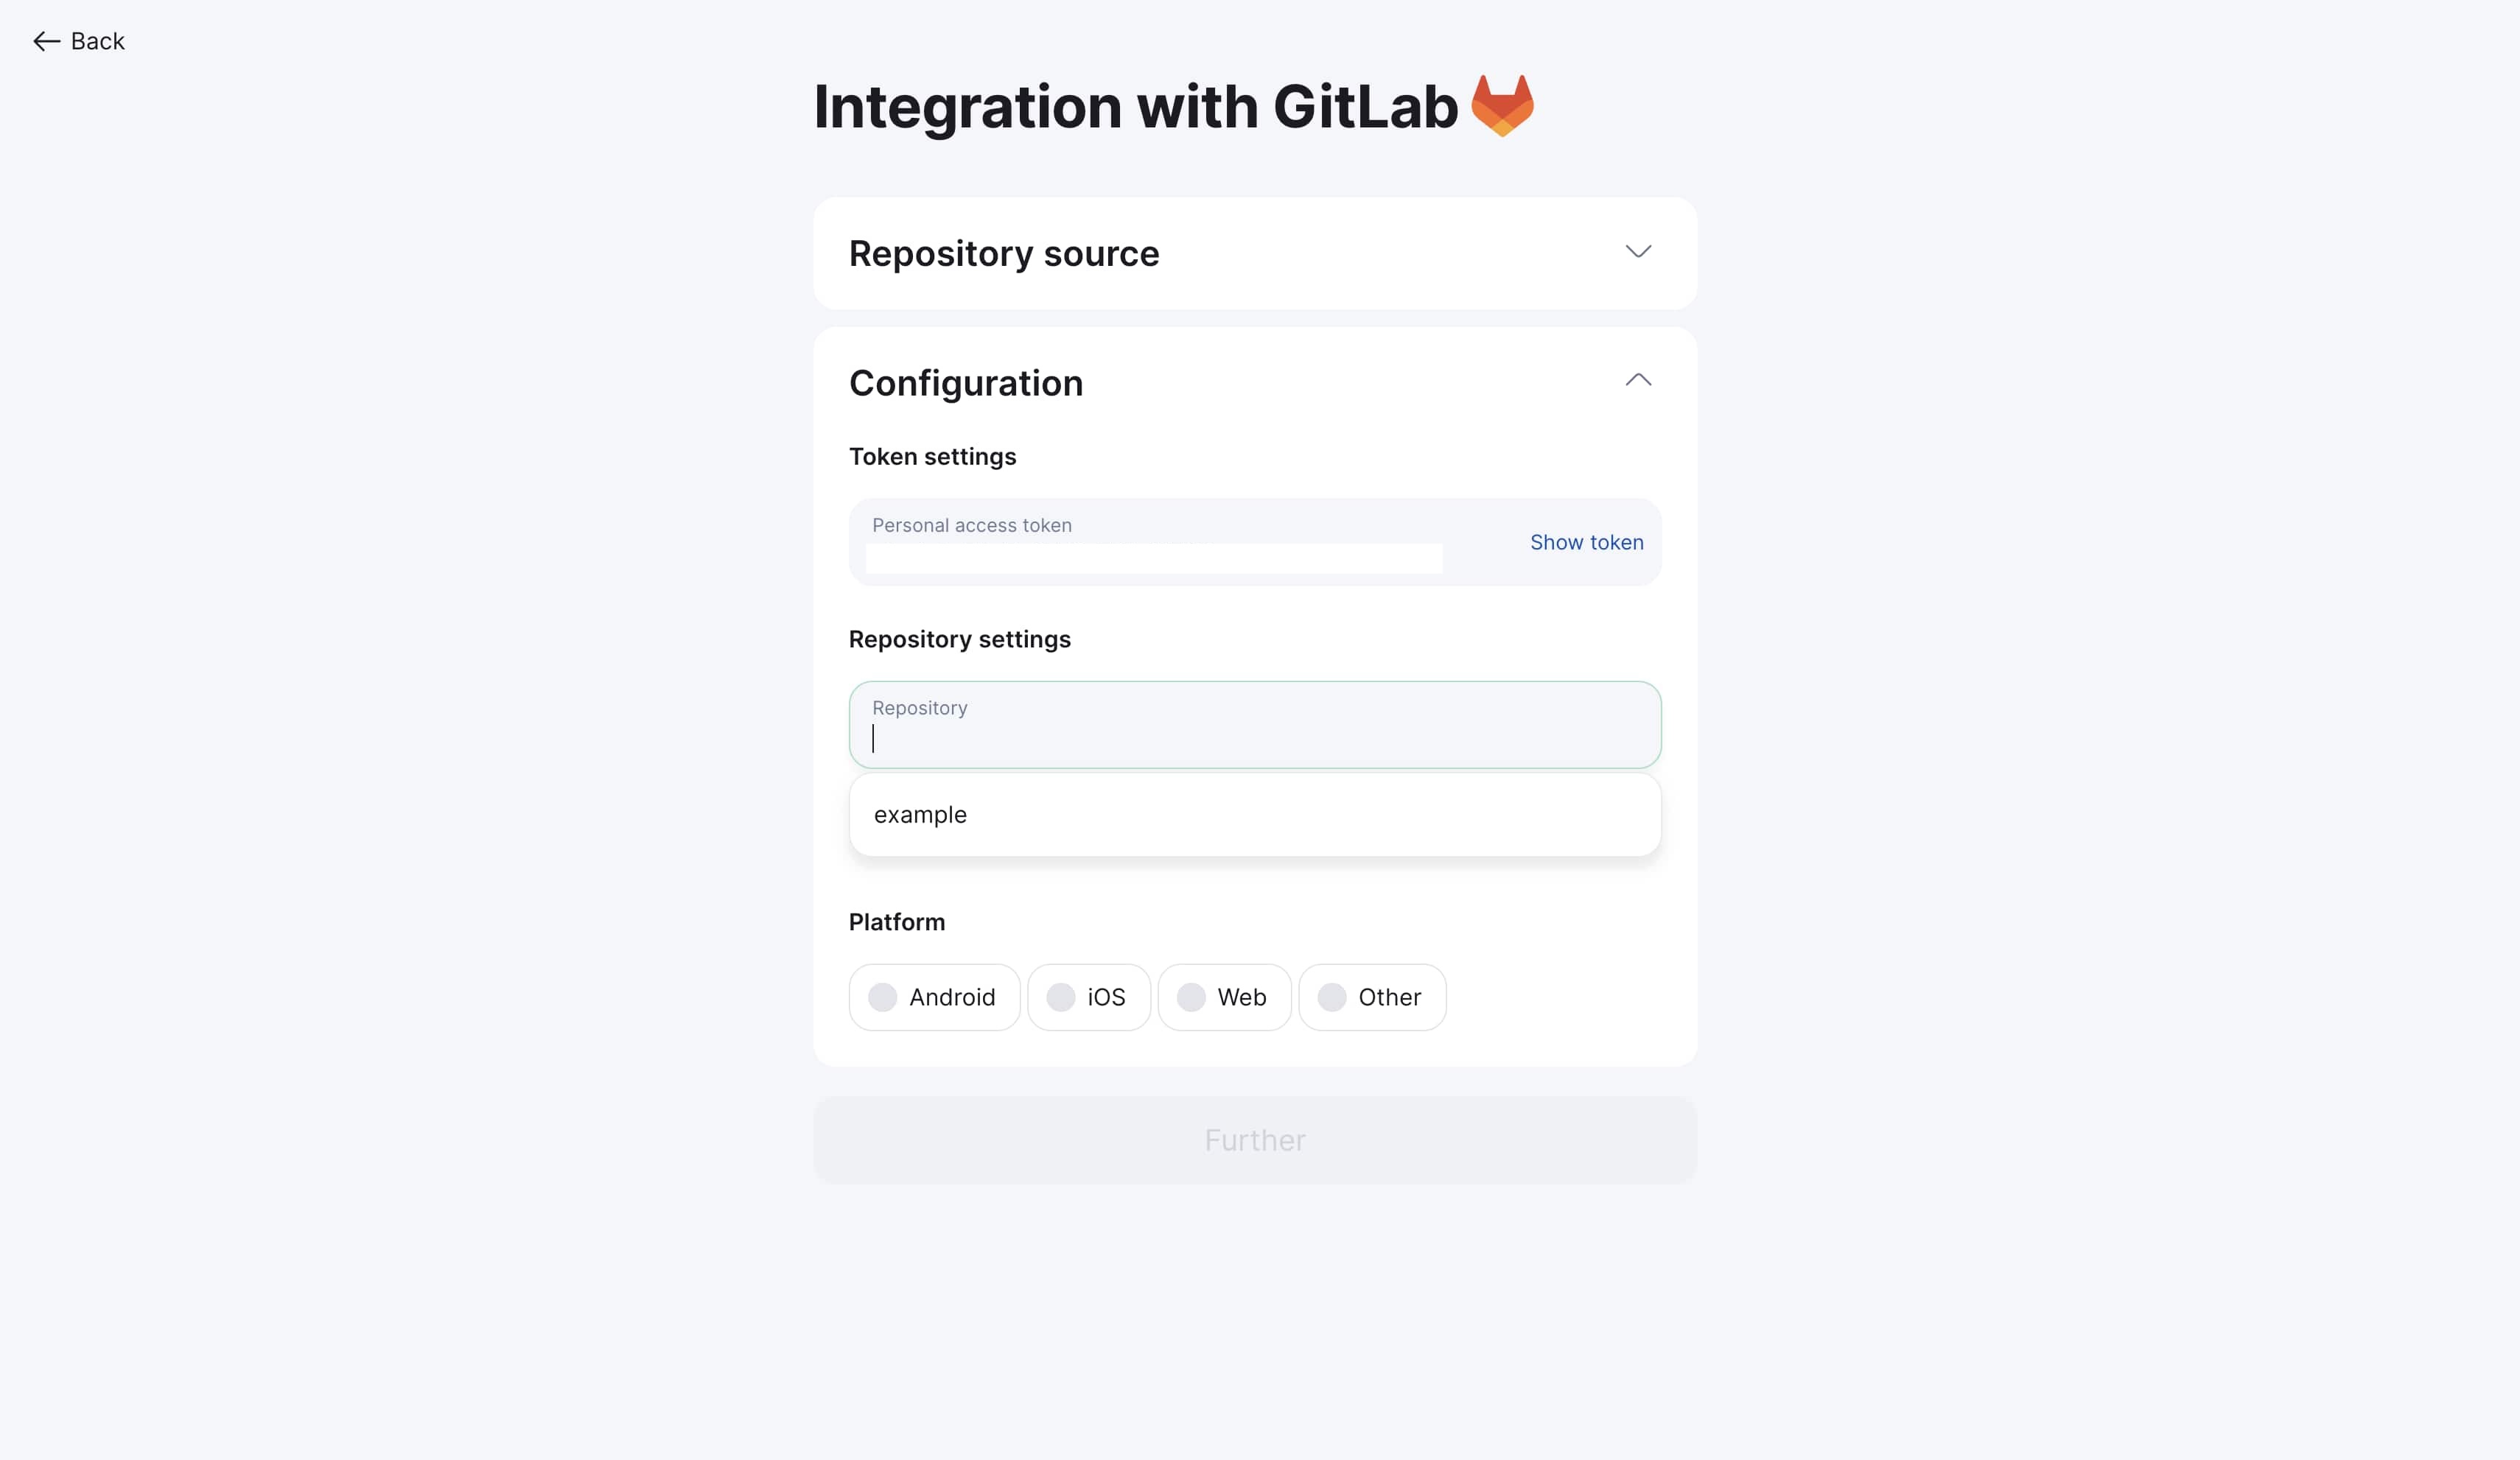
Step 3: Specify working branch
-
Specify working branch (usually
main,master, ordevelop) -
Search by branch name available
-
System shows all available branches
Platform and file configuration
Step 1: Choose platform type
Select platform type according to your project:
-
Web (.json, .po, .pot, .mo)
-
Android (.xml)
-
iOS (.strings, .stringsdict)
-
Other (.srt, custom formats)

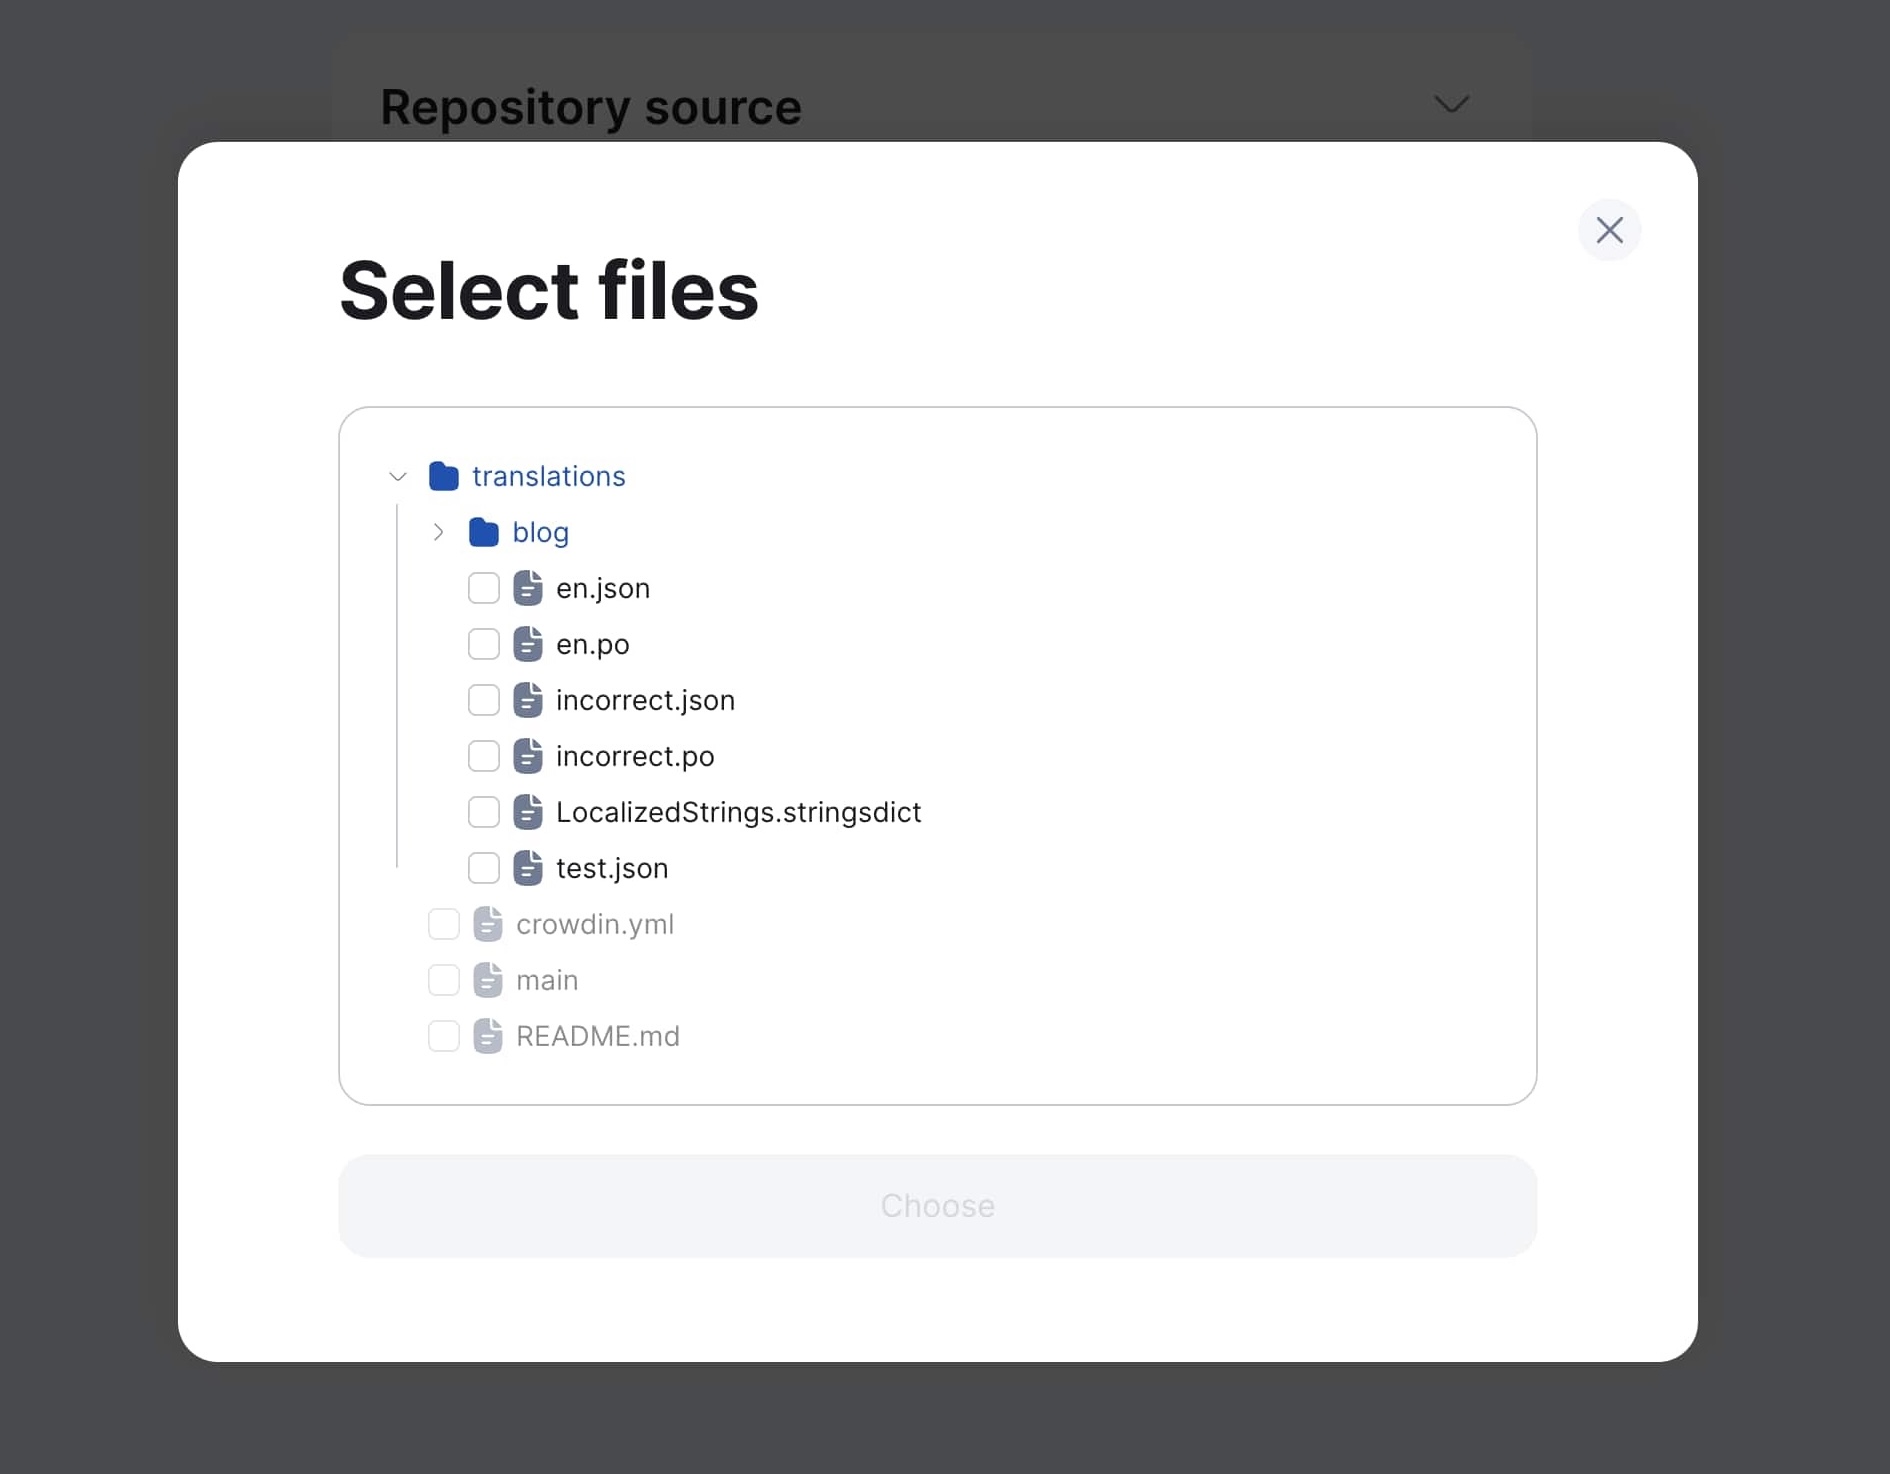
Step 2: Add files
-
Click "Next" to proceed to file selection
-
Click "Add file"
-
Select needed files in repository file tree
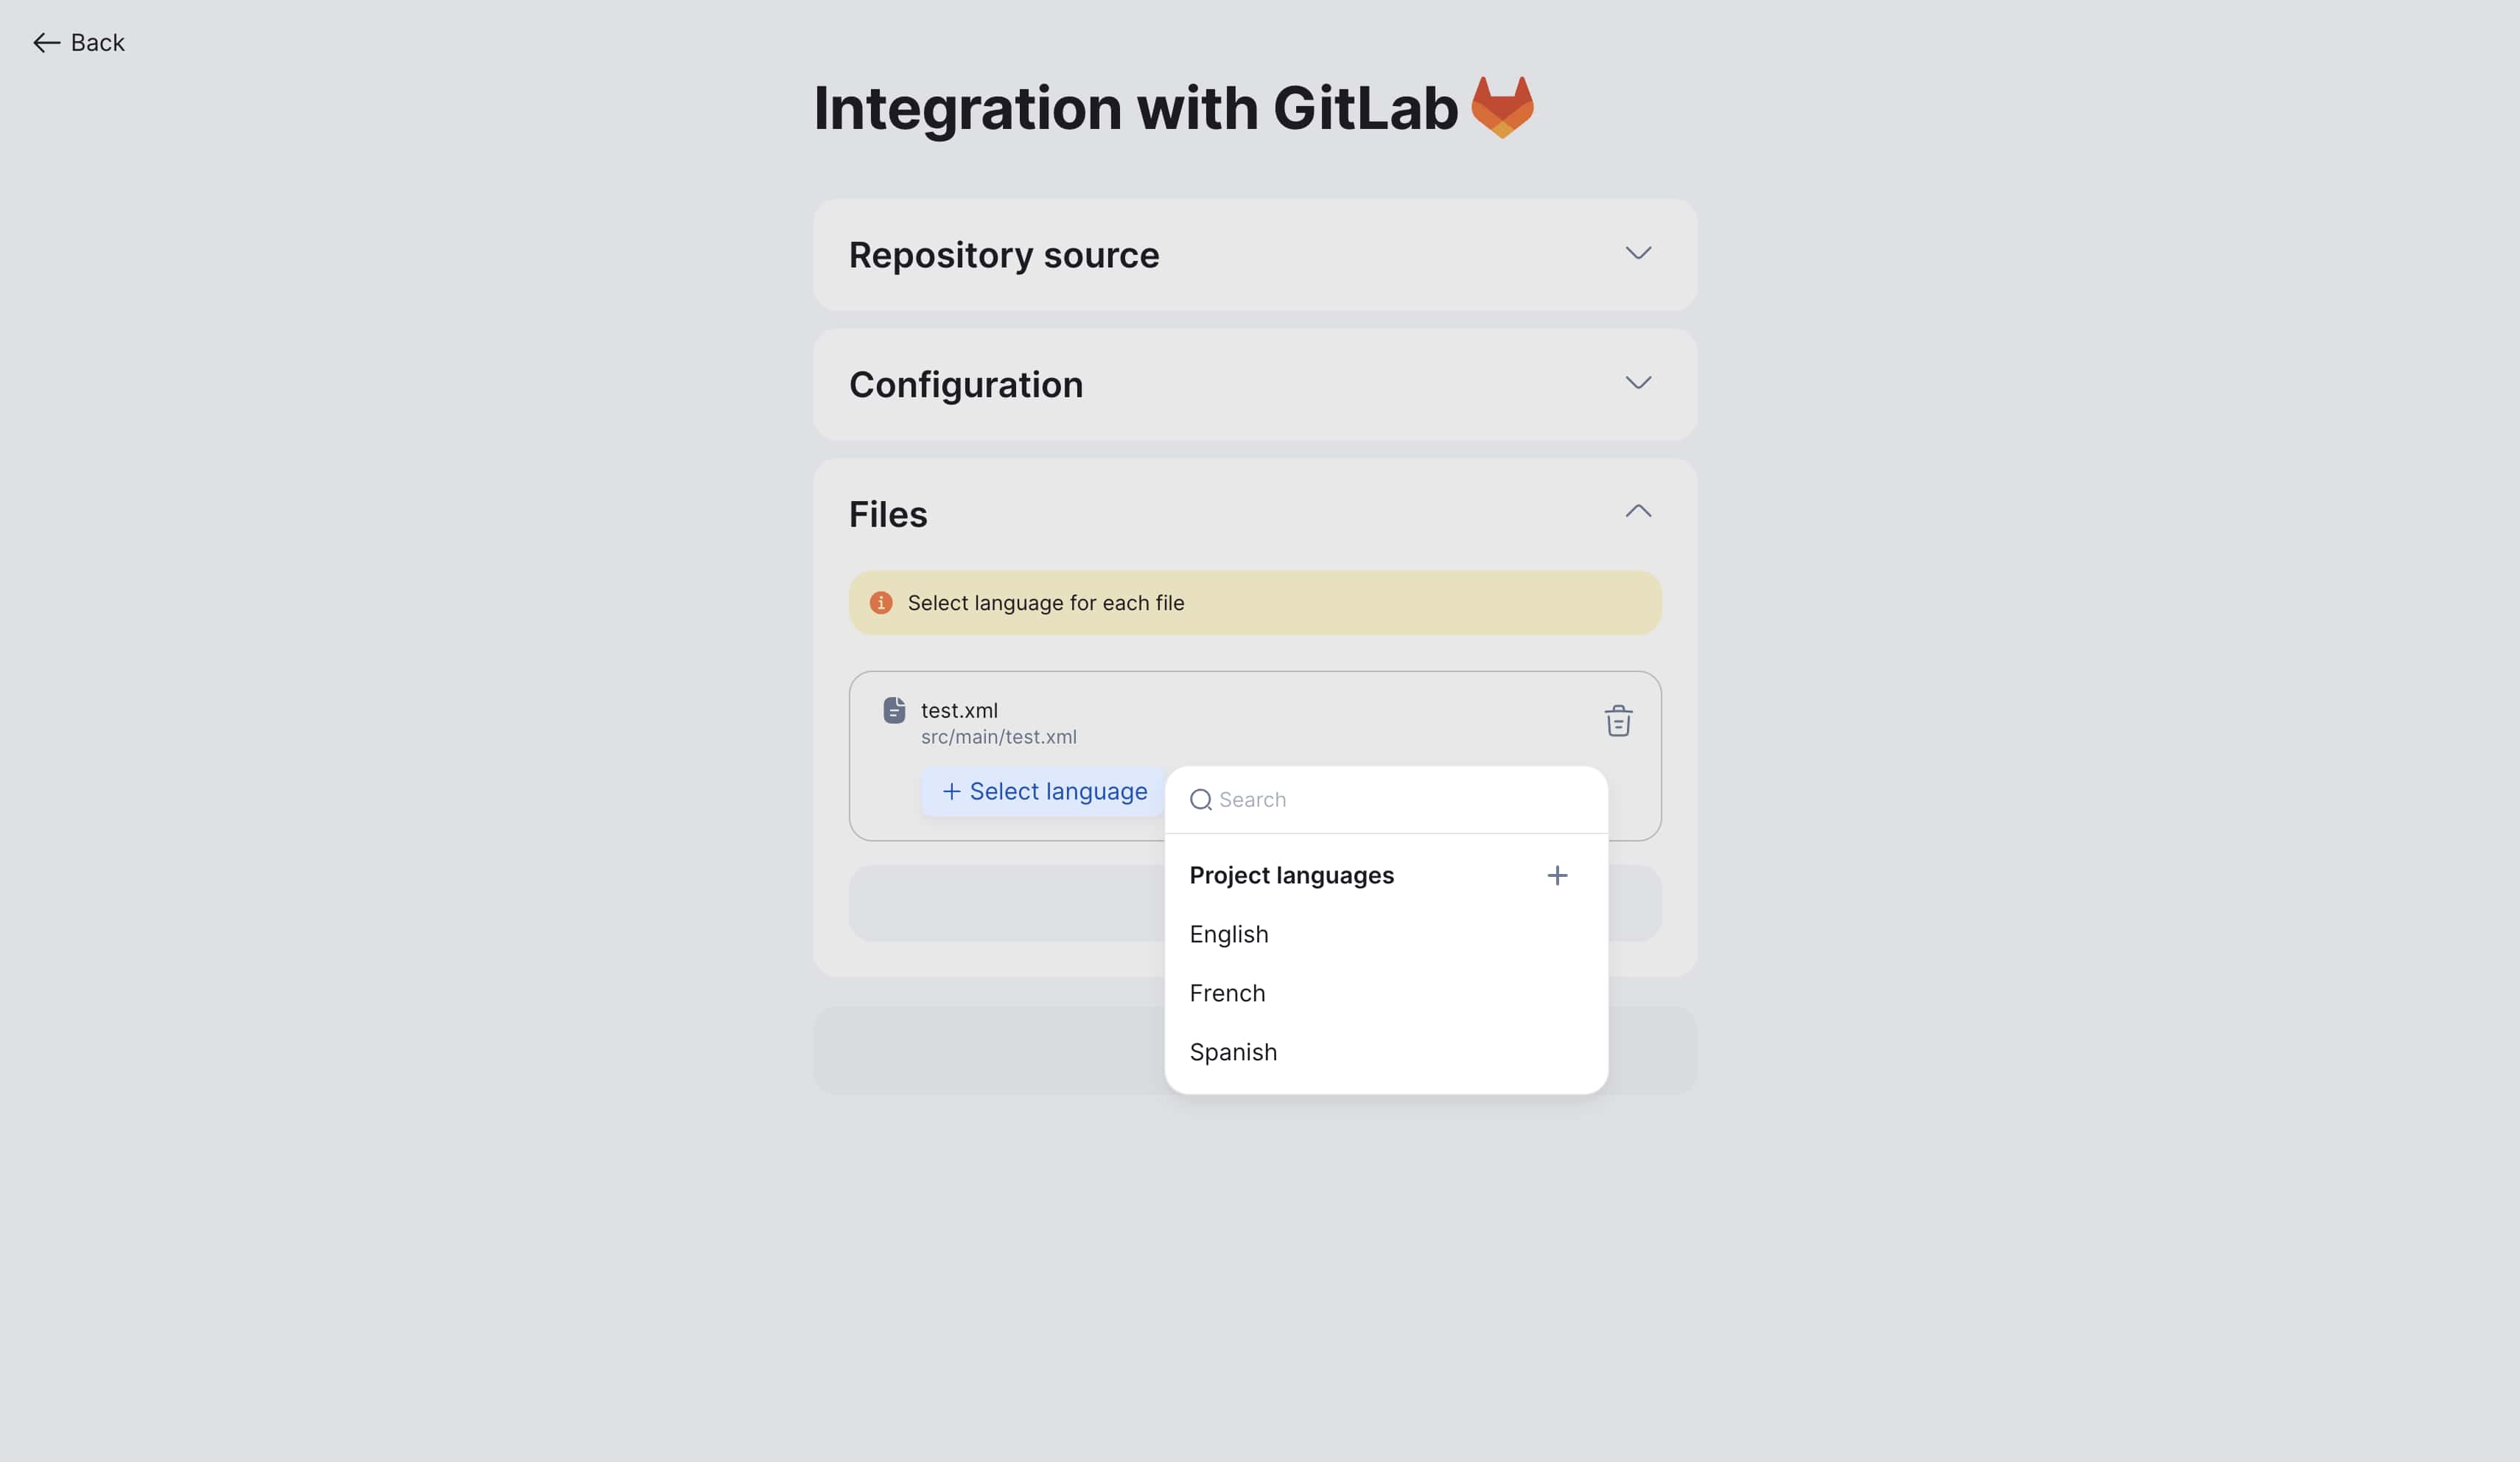
Step 3: Configure languages
-
Specify corresponding language for each file
-
System automatically detects language by file path
-
Correct automatic detection if needed
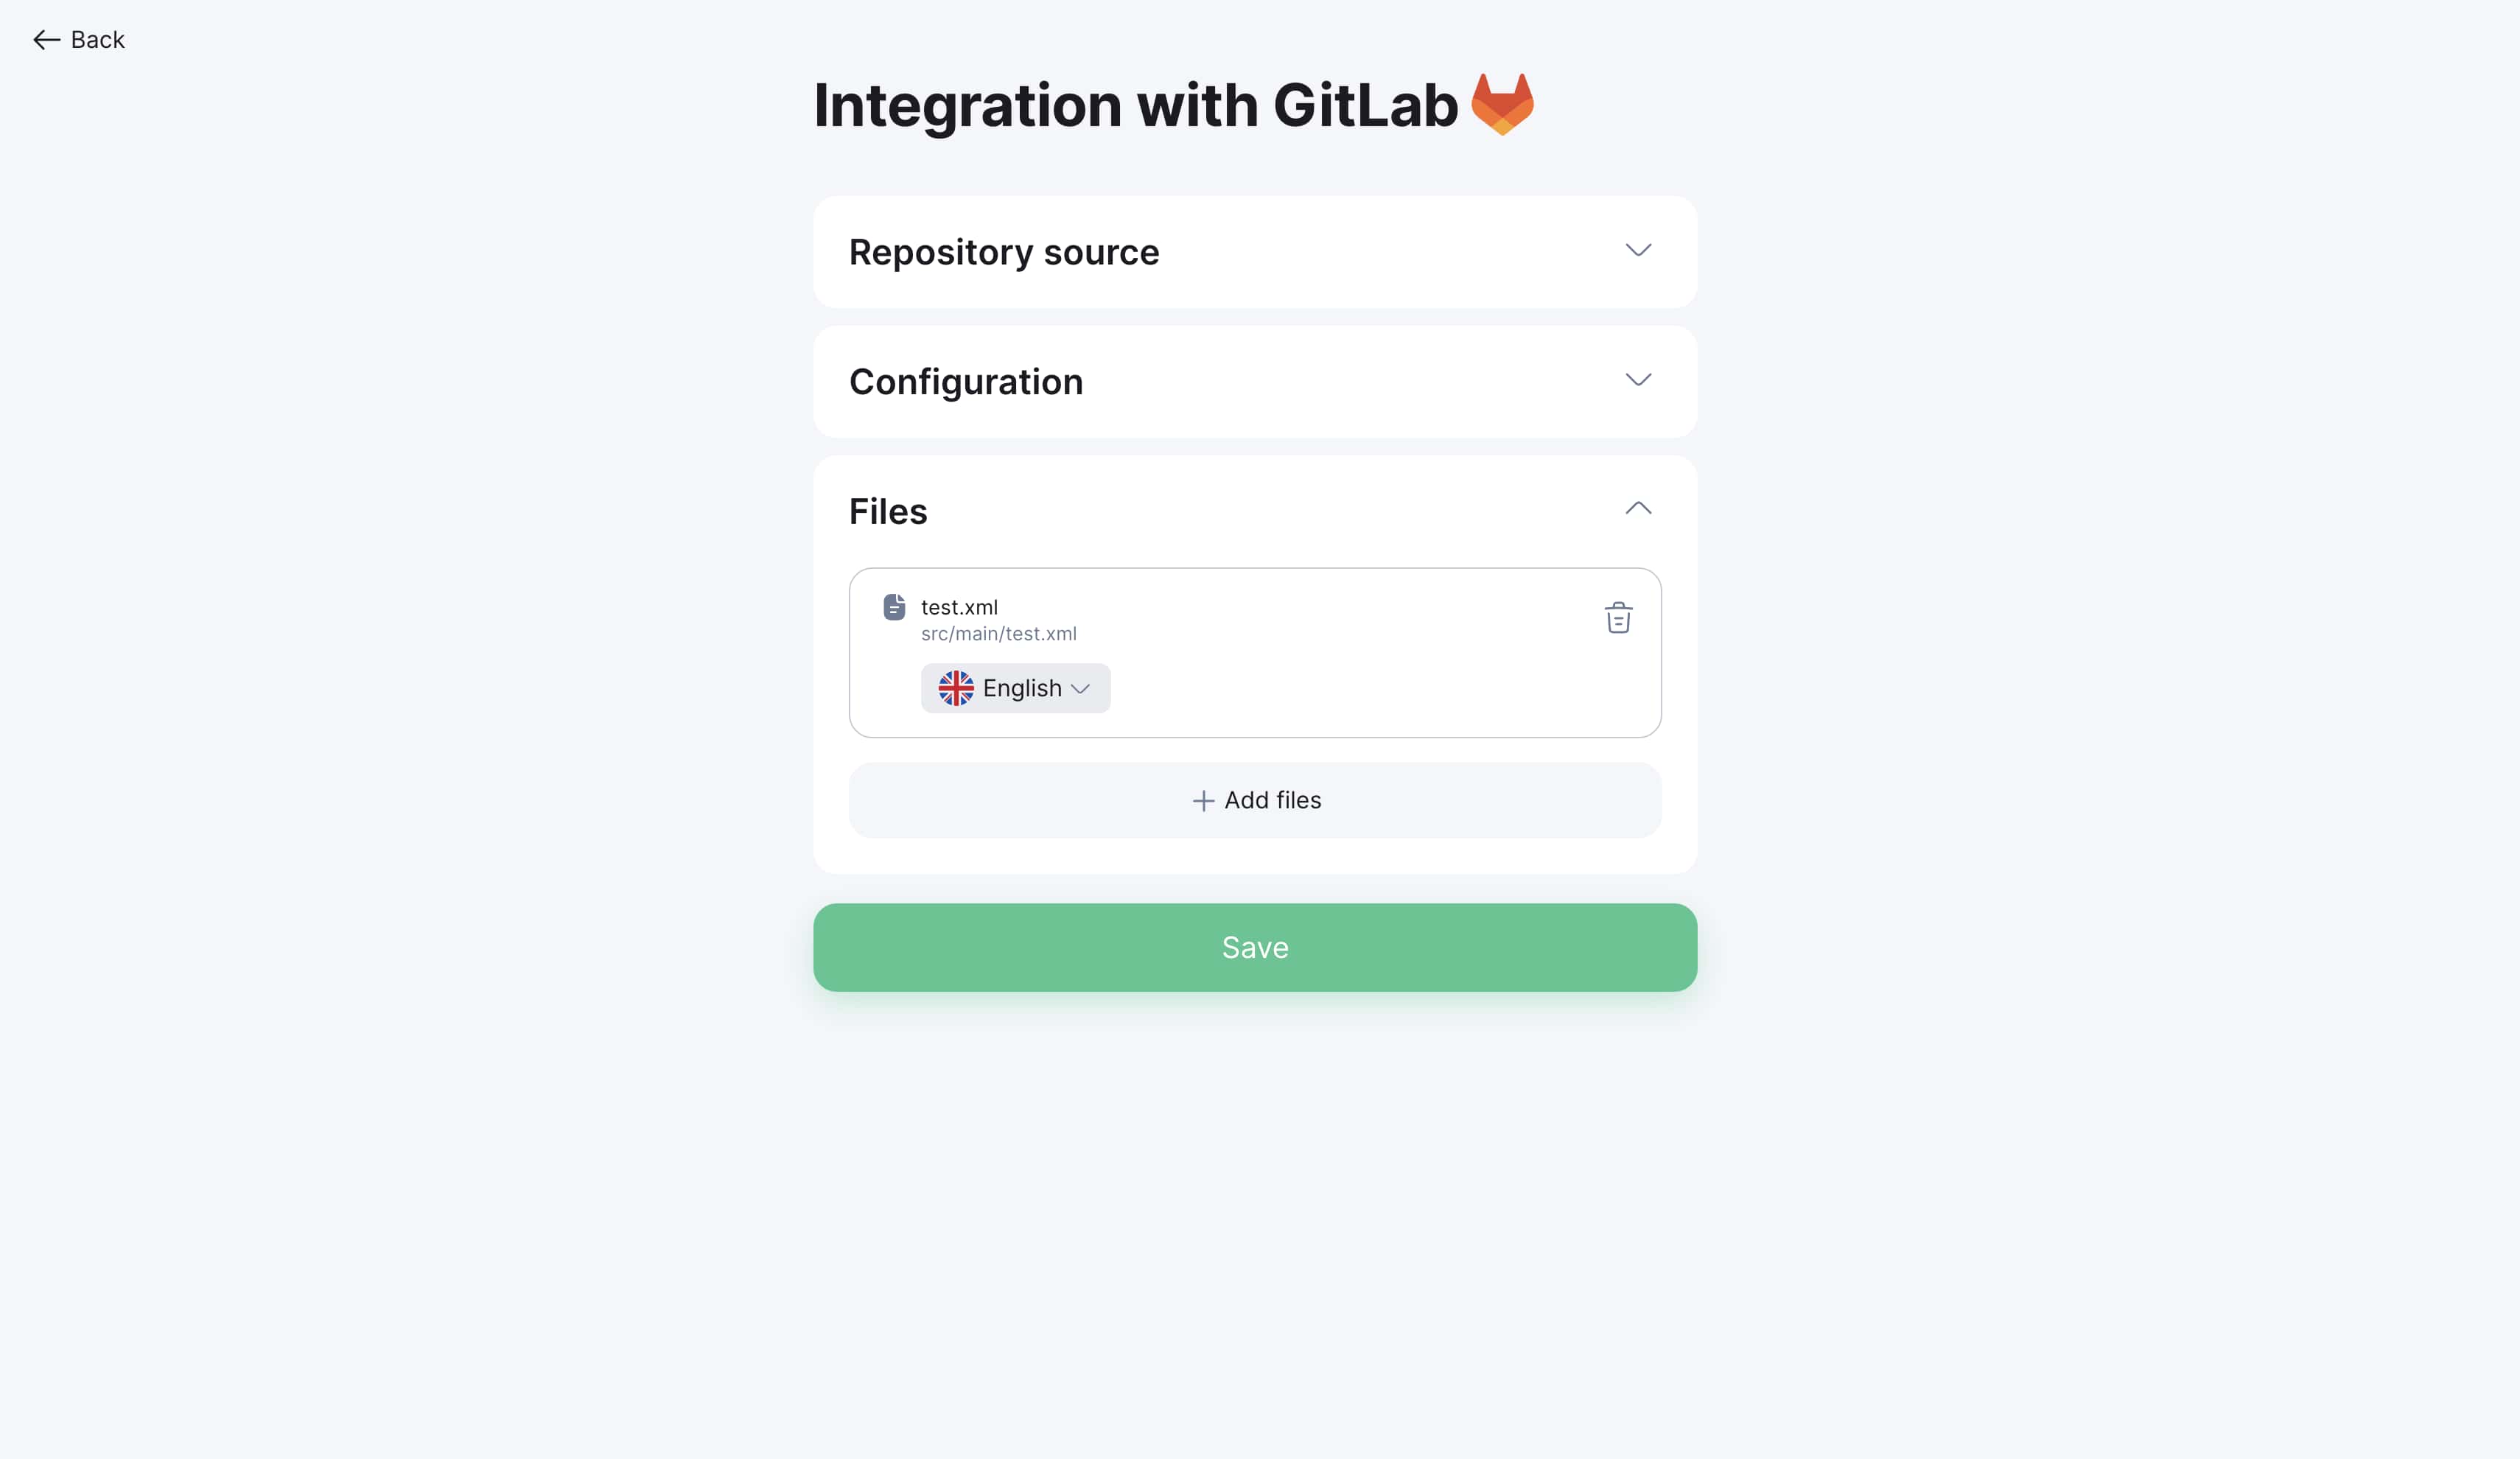
Step 4: Save configuration
-
Review all settings
-
Click "Save"
-
Integration will be configured and ready to use
Initial localization setup
Important for new projects
If you haven't translated your project to other languages yet, follow this workflow:
Step 1: Create empty localization files
-
Create empty localization files in your GitLab repository
-
Follow folder structure for your platform:
For iOS:
en.lproj/Localizable.strings
es.lproj/Localizable.strings
fr.lproj/Localizable.strings
For Android:
app/src/main/res/values/strings.xml
app/src/main/res/values-es/strings.xml
app/src/main/res/values-fr/strings.xml
For Web:
src/locales/en.json
src/locales/es.json
src/locales/fr.json
Step 2: Connect integration
-
Set up GitLab integration as described above
-
Connect created files to project
-
Perform initial Pull to load structure
Step 3: Translate keys
-
Translate necessary keys using translation editor
-
Or order automatic translation through AI services
-
Review translation quality
Step 4: Send to GitLab
-
Perform Push to send translations to repository
-
Verify files updated in GitLab
-
Test localization in application
Pull requests (Import from GitLab)
Initiating Pull request
-
Go to project "Integrations" section
-
Find connected GitLab repository
-
Click "Pull" button

Within seconds project will be updated - all keys from GitLab will be loaded into your Localit.io project
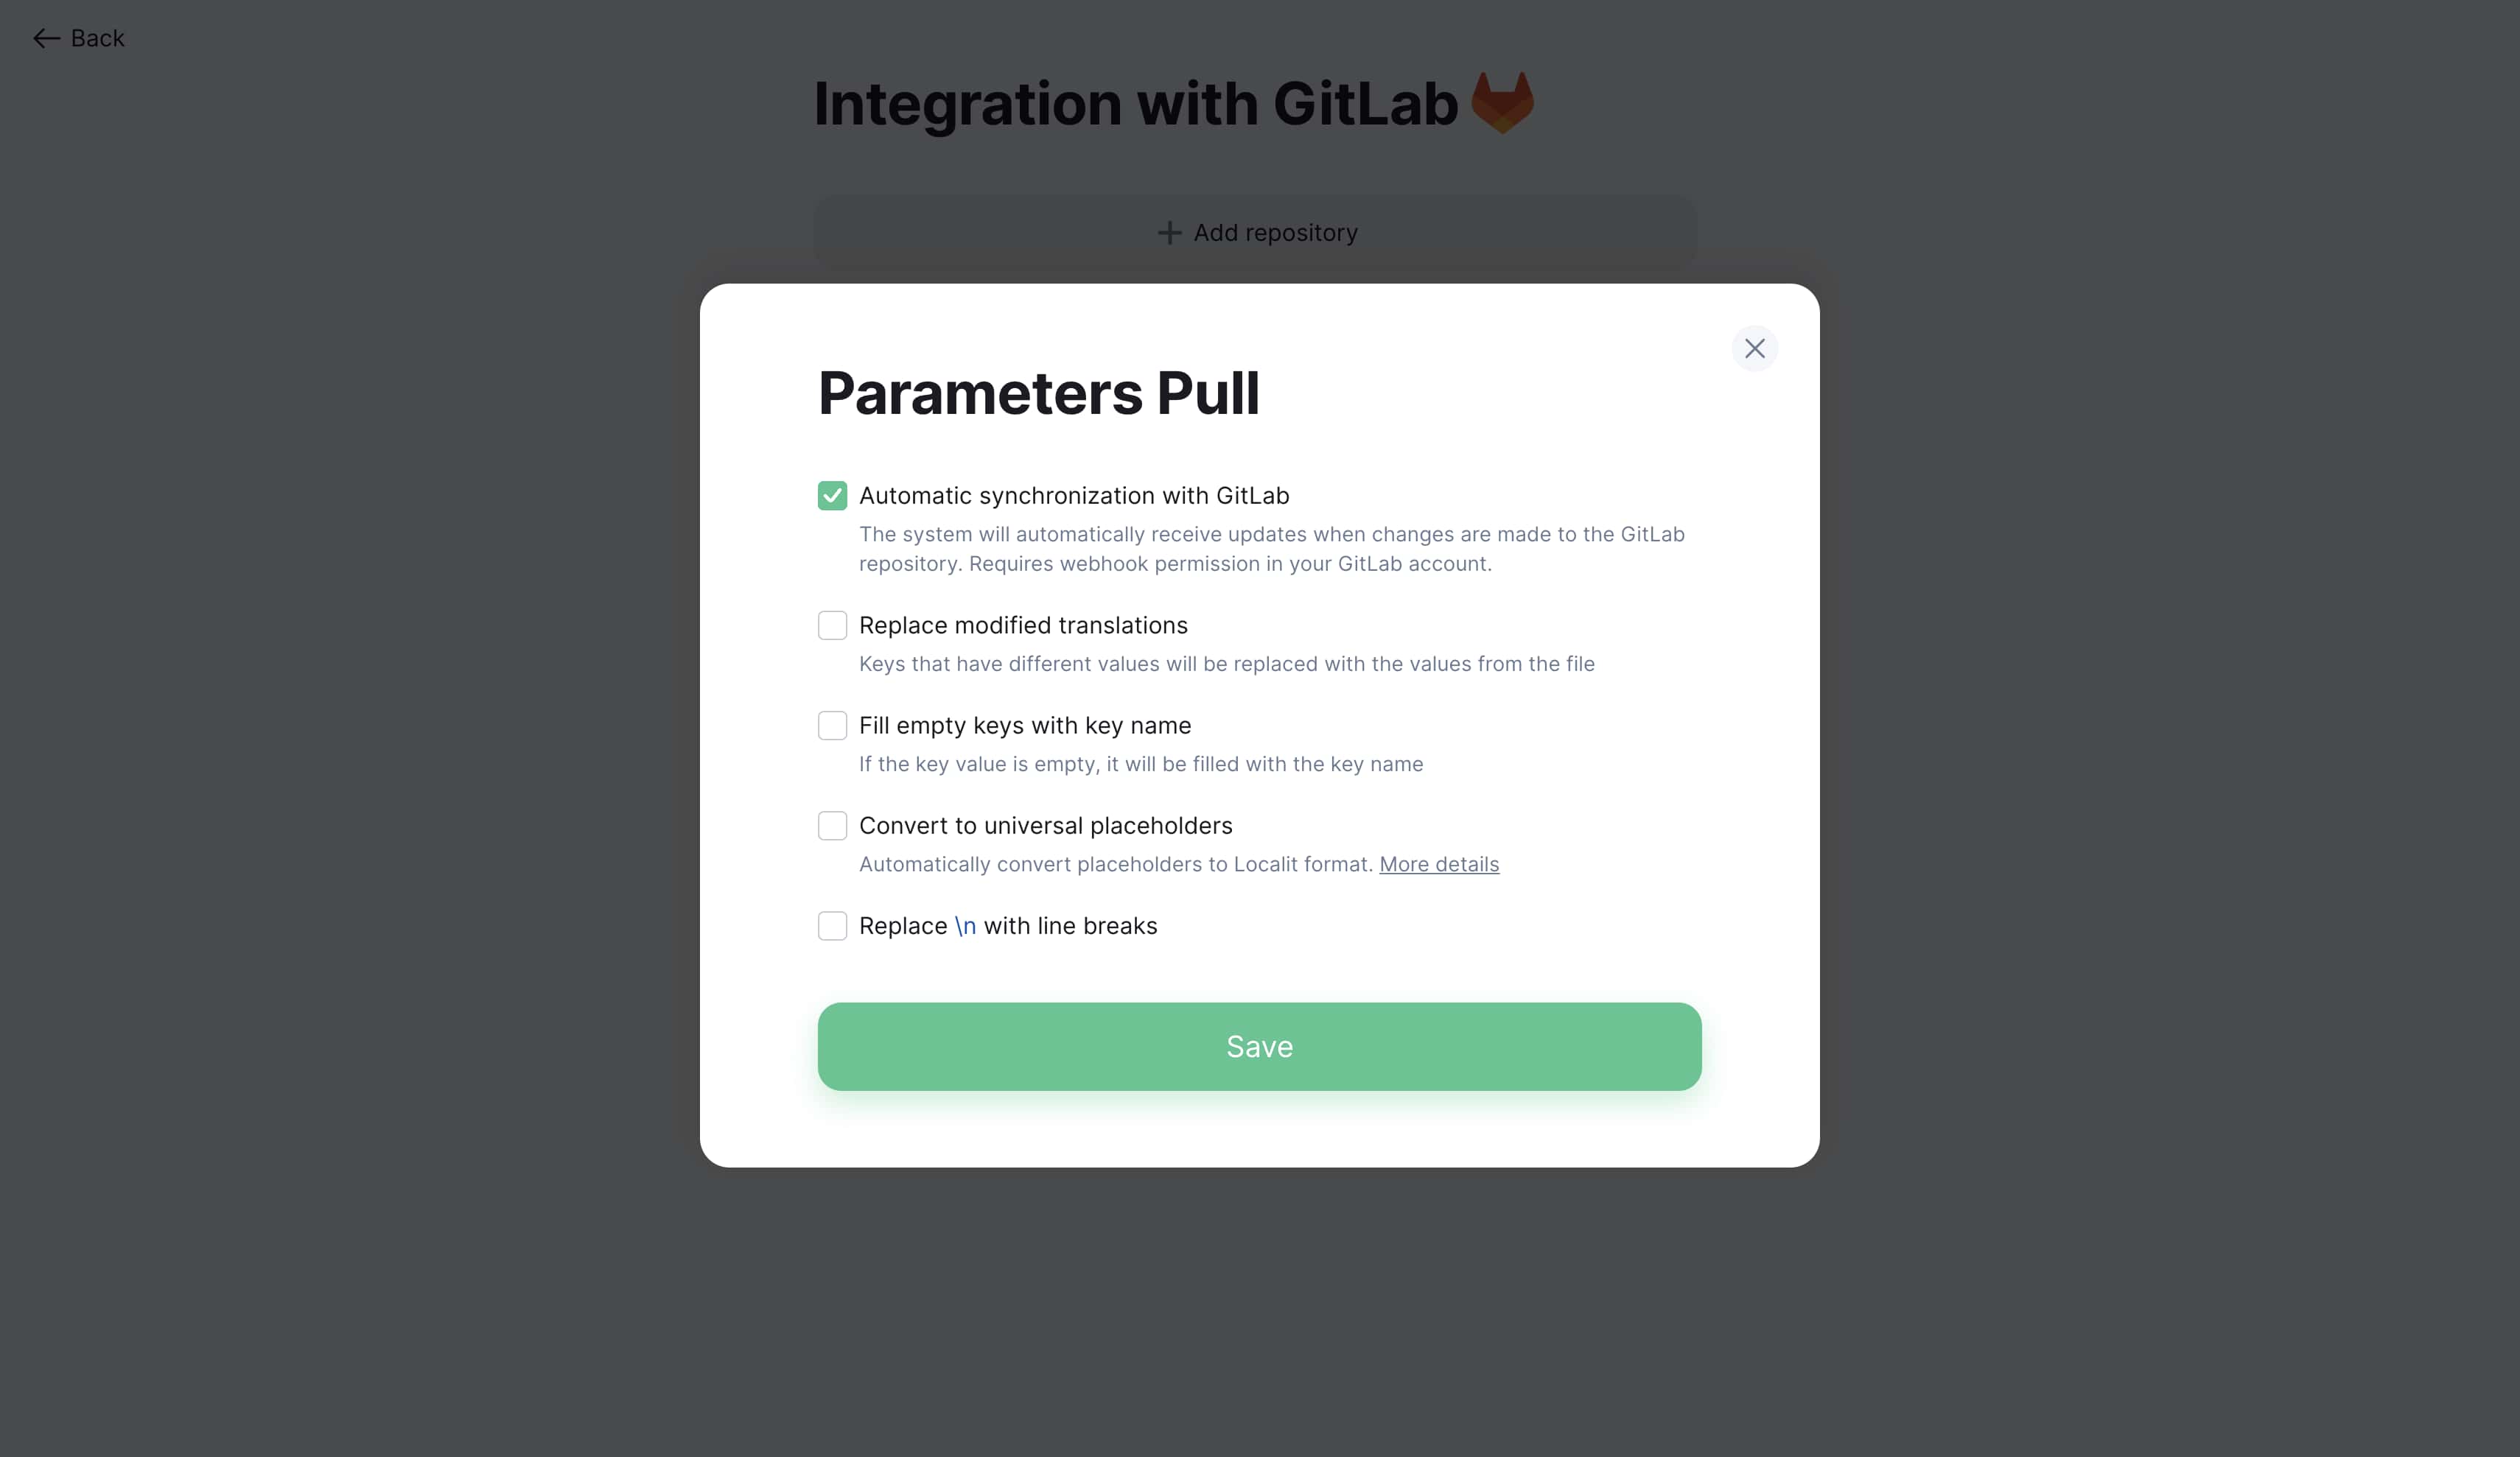
Parameter configuration: Pull request parameters correspond to manual file upload parameters. Details in File Upload Guide.
Automatic synchronization with GitLab
Function: Project automatically updates when repository changes Requirements: Webhook permission when creating token Benefits: Continuous synchronization without manual intervention
Push requests (Export to GitLab)
Initiating Push request
-
Go to project "Integrations" section
-
Find connected GitLab repository
-
Click "Push" button
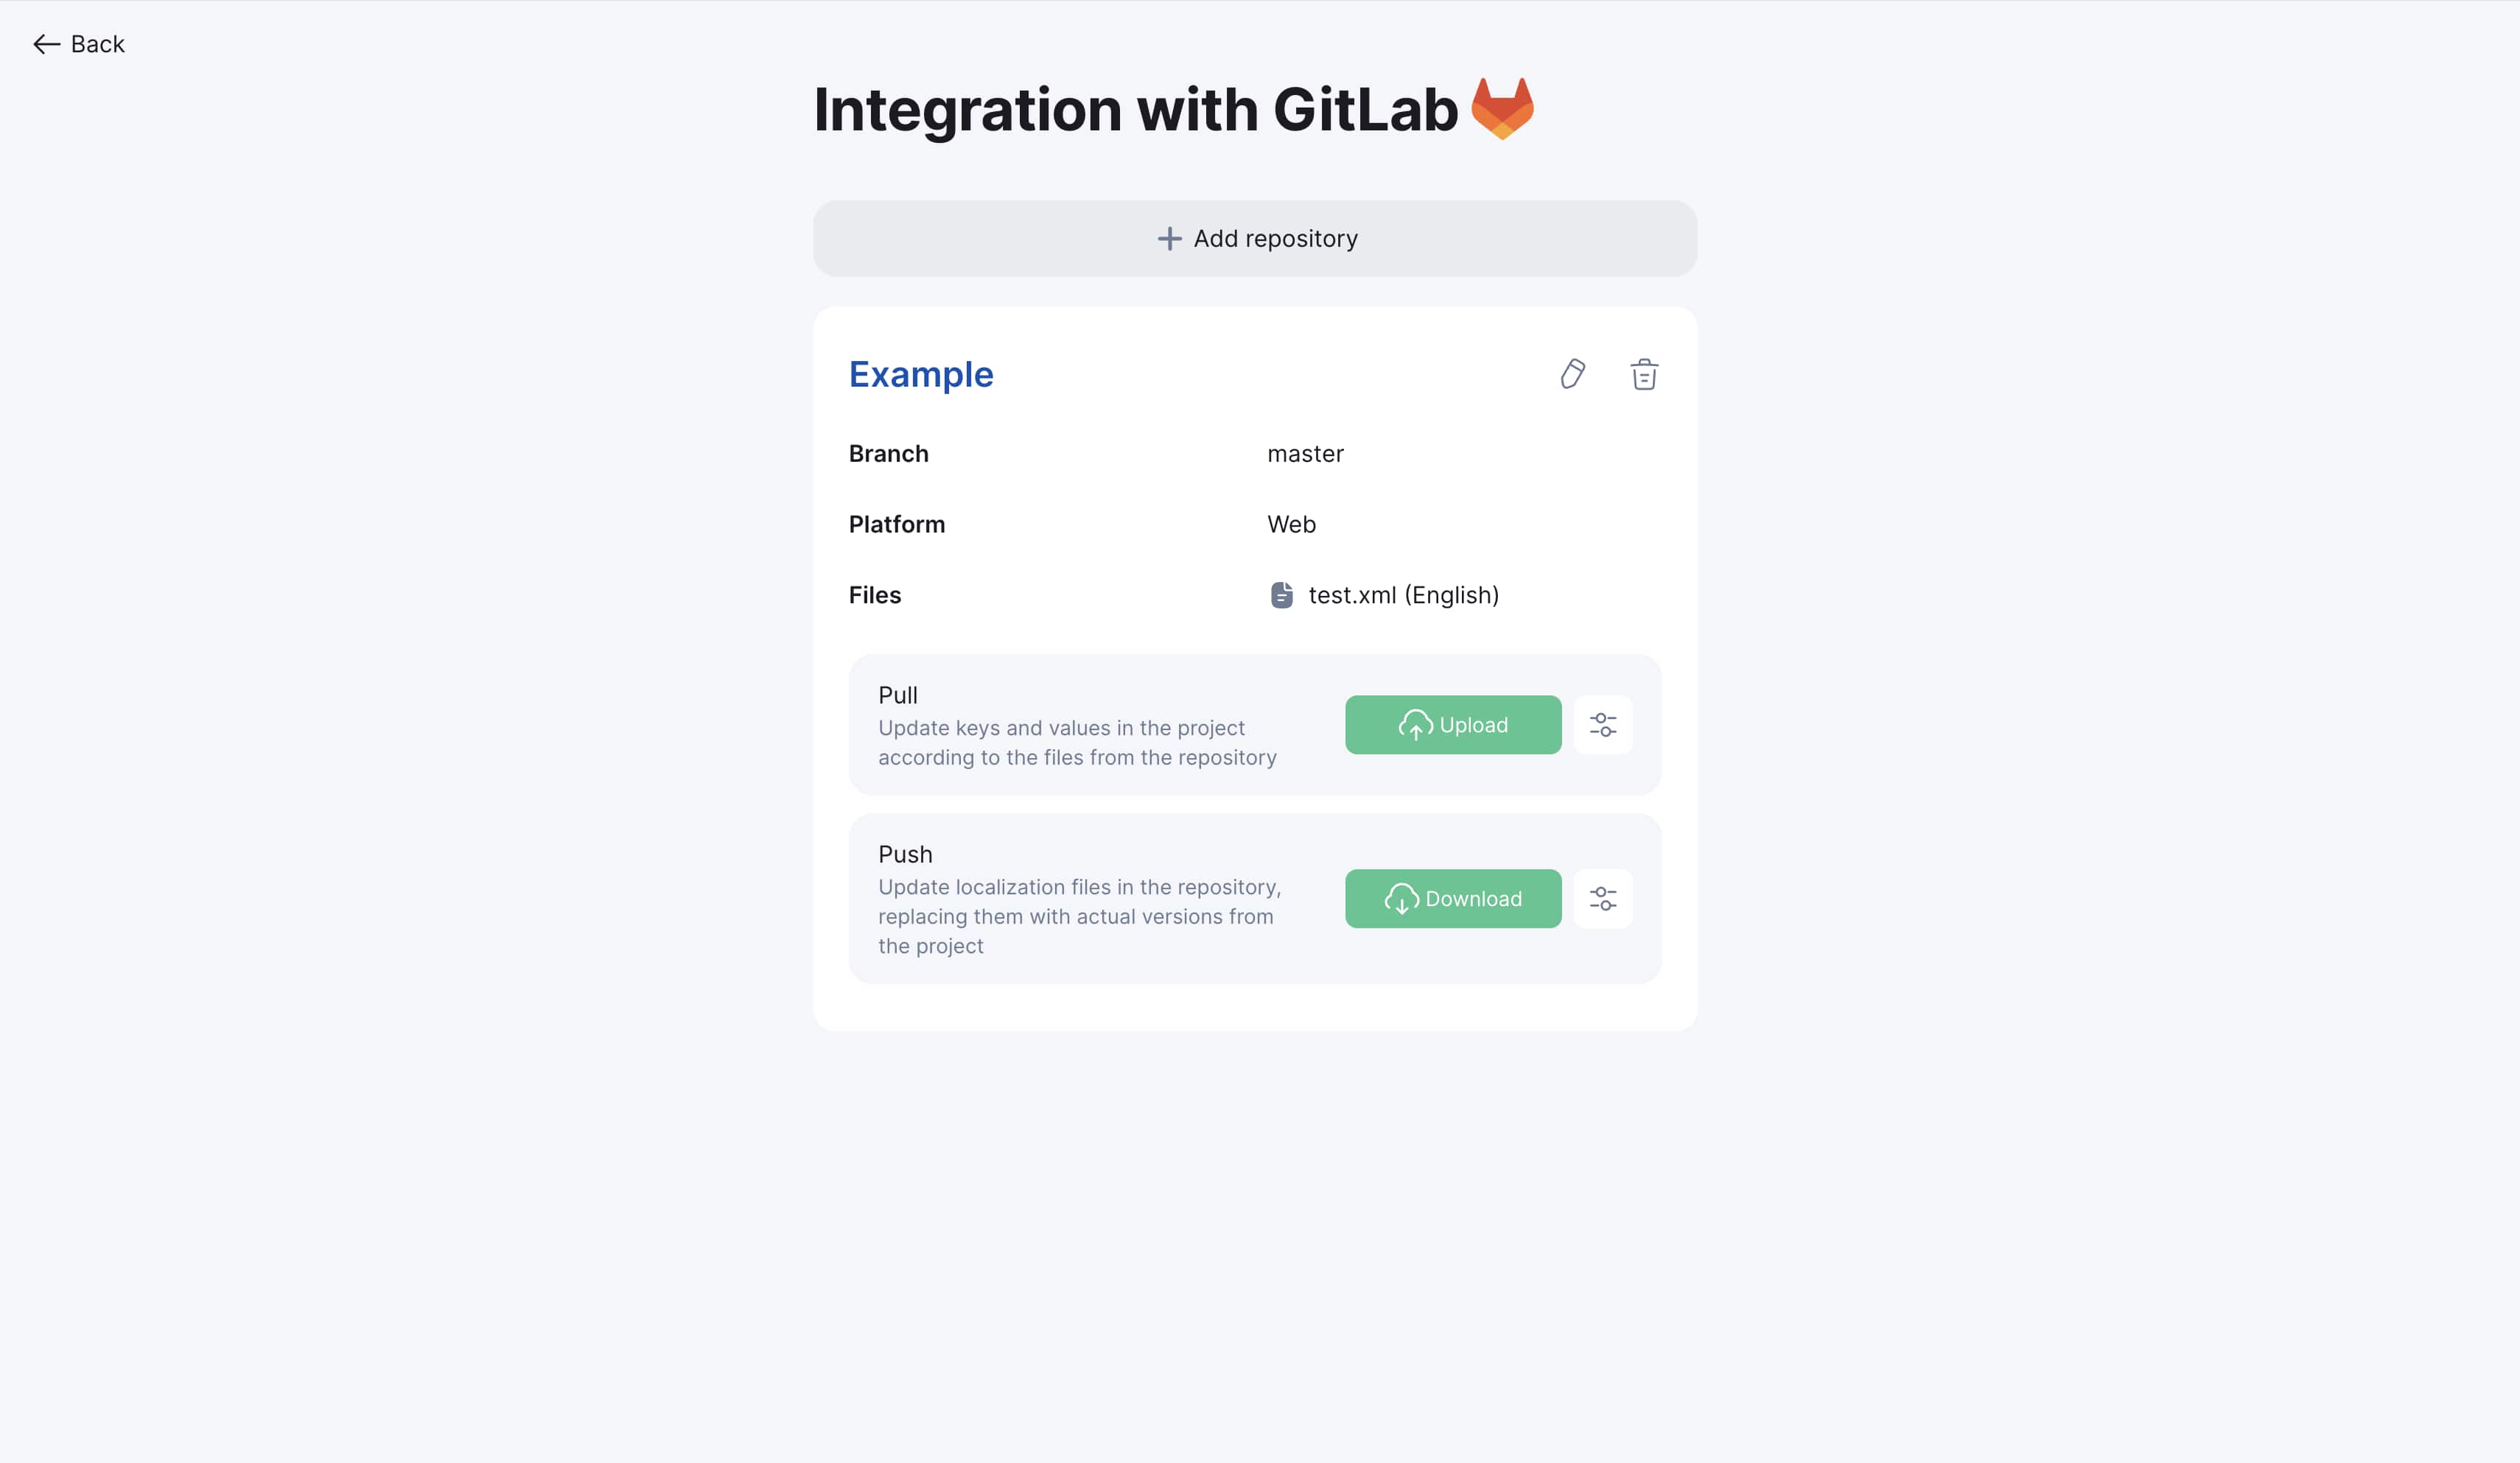
Within seconds repository will be updated - all translations from Localit.io will be sent to your GitLab repository
Parameter configuration: Push request parameters correspond to manual file download parameters. Details in File Download Guide.
Troubleshooting
Token issues
Token not working:
-
Check token expiration date in GitLab Settings
-
Ensure correct copying (no extra spaces)
-
Verify token permissions
Insufficient permissions:
-
Return to token settings in GitLab
-
Add missing permissions (api, read_repository, write_repository, read_api)
-
For Project Access Token ensure Maintainer or Owner role
Repository issues
Repository not displayed:
-
Ensure token has repository access
-
Check that repository is not archived
-
For private repositories ensure appropriate permissions
Files not synchronizing:
-
Check correct file path specification
-
Ensure files exist in specified branch
-
Verify file format matches expected
Webhook issues
Automatic synchronization not working:
-
Check webhook settings in GitLab project
-
Ensure token has read_api permission
-
Verify webhooks not blocked by firewall

GitLab Self-hosted specific issues
Self-hosted connection problems:
-
Ensure correct GitLab server URL
-
Check server network accessibility
-
Consult GitLab administrator about security settings
Corporate policy restrictions:
-
Contact GitLab administrator
-
Request necessary integration permissions
-
Clarify allowed external applications list
Project Access Token issues
Project token not working:
-
Ensure token role is Maintainer or Owner
-
Check token created for correct project
-
Verify all necessary scopes are present
Best practices
Token security
Recommendations:
-
Use Project Access Token instead of Personal Access Token
-
Set minimal necessary permissions
-
Regularly update tokens
-
Remove unused tokens
Token comparison:
Token Type | Access Scope | Security | Recommended |
|---|---|---|---|
Personal Access Token | All user projects | Medium | For multiple projects |
Project Access Token | One specific project | High | Yes |
Workflow organization
Branch strategy:
-
Use separate branch for localization
-
Configure automatic merge to main branch
-
Regularly synchronize changes
Change monitoring:
-
Set up Pull/Push operation notifications
-
Regularly check synchronization status
-
Maintain change logs for audit